These are some attempts I made during my undergraduate graduation project.
The hardware platform I use is PYNQ-Z2.
The PS part is an Arm CPU running Ubuntu 16.04 LTS, which supports Python.
The PL part is the Zynq XC7Z020 FPGA.
The version of Vivado and Vivado HLS is 2018.2.
Any problems,please contact me.
Digilent Vivado IP Library
This is the open source IP library provided by Digilent for video processing. I mainly use its rgb2dvi to implement my HDMI video output module.
HDMI VDMA Test
This is the Vivado project of the HDMI video output test I built. The video data is output from the DDR memory through VDMA. Please see the Ultrasound Image Classification section for details.
Mean Single Convolution
This is the project I built to try the PYNQ development flow before implementing CNN, which realizes hardware acceleration for a single convolution operation.
Minst CNN
This is the project that implements the classification of the Minst dataset.
Ultrasound Image Classification CNN
This project achieved automatic classification of ultrasound images and it is my latest achievement currently. It can read ultrasound image data from the SD card for classification, then synthesize the resulting image and output it through the HDMI port. Due to privacy issues, I only uploaded a small number of images for testing.
Within getStaticPaths, fetch all project identifiers to tell Next.js what params to expect/pre-render:
exportconstgetStaticPaths=async()=>{constslugs=awaitgetProjectSlugs();constpaths=slugs.map(item=>({params: {slug: item.slug},}));// Pre-render only fetched paths at build time.// Server-side render on demand if the path doesn't exist.return{ paths,fallback: "blocking"};};
Translation may include argument interpolation. For doing this use regular crystal named interpolation placeholder and pass hash or named tuple as a options argument:
Also any extra key-value pair will be ignored and missing one will not cause any exception:
I18n.translate("message.new", {message:"hello"}) # New message: %{text}
Configuration
require"i18n"I18n.load_path += ["spec/locales"]
I18n.init # This will load locales from all specified locationsI18n.default_locale ="pt"# default can be set after loading translations
There is a handler for Kemalyst that bring I18n configuration.
Available backends
I18n::Backend::Yaml
A simple backend that reads translations from YAML files and stores them in an in-memory hash. Also supports JSON files and translations embedding.
I18n::Backend::Chain
Backend that chains multiple other backends and checks each of them when a translation needs to be looked up. This is useful when you want to use standard translations with a custom backend to store custom application translations in a database or other backends.
To use the Chain backend instantiate it and set it to the I18n module. You can add chained backends through the initializer:
require"i18n/backend/chain"
other_backend =I18n::Backend::Yaml.new # your other backendI18n.backend.load("config/locales/en.yml")
other_backend.load("config/locales/pl.yml")
I18n.backend =I18n::Backend::Chain.new([I18n.backend, other_backend2] of I18n::Backend::Base)
# or if it is ok to pass files to each backendI18n.backend =I18n::Backend::Chain.new([I18n.backend, I18n::Backend::Yaml.new] of I18n::Backend::Base)
I18n.load_path = ["config/locales/{en,pl}.yml"]
I18n.load
I18n::Backend::Fallback
I18n locale fallbacks are useful when you want your application to use translations from other locales when translations for the current locale are missing. E.g. you might want to use en translations when translations in your applications main locale de are missing.
To enable locale fallbacks you can instantiate fallback backend giving it your backend as an argument:
Putting translations for all parts of your application in one file per locale could be hard to manage. You can store these files in a hierarchy which makes sense to you.
For example, your config/locales directory could look like this:
This way you can separate model related translations from the view ones. To require all described subfolders at once use ** – I18n.load_path += ["locals/**/"]
Any .json file located in the file hierarchy specified for load_path is also read and parsed.
Date/Time Formats
To localize the time (or date) format you should pass Time object to the I18n.localize. To pick a specific format path format argument:
By default Time will be localized with :time scope.
To specify formats and all need localization information (like day or month names) fill your file in following way:
NOTE: According to ISO 8601, Monday is the first day of the week
__formats__:
date:
formats:
default: '%Y-%m-%d'# is used by defaultlong: '%A, %d de %B %Y'month_names: # long month names
- Janeiro
- Fevereiro
- Março
- Abril
- Maio
- Junho
- Julho
- Agosto
- Setembro
- Outubro
- Novembro
- Dezembroabbr_month_names: # month abbreviations
- Jan
- Fev# ...day_names: # fool day names
- Segunda# ...abbr_day_names: # short day names
- Seg# ...
Format accepts any crystal Time::Format directives. Also following directives will be automatically localized:
Directive
Description
Key
%a
short day name
date.abbr_day_names
%A
day name
date.day_names
%b
short month name
date.abbr_month_names
%B
month name
date.month_names
%p
am-pm (lowercase)
time.am/time.pm
%P
AM-PM (uppercase)
time.am/time.pm
Pluralization
In many languages — including English — there are only two forms, a singular and a plural, for a given string, e.g. “1 message” and “2 messages”. Other languages (Arabic, Japanese, Russian and many more) have different grammars that have additional or fewer plural forms.
The count interpolation variable has a special role in that it both is interpolated to the translation and used to pick a pluralization from the translations according to the pluralization rules defined by CLDR:
We aim to solve the problems of information asymmetry in identifying and optimizing returns on staking, reducing time and capital costs for stakers to make staking decisions.
At least one account on Kusama with enough balance to pay for transaction fees and bond funds.
Currently, the app can be used on https://yieldscan.onrender.com/, but the domain is likely to change and shall be updated here.
⚠️IMPORTANT: Please note that this project is in early beta stage and bugs and issues are to be expected.
Borrowing from Kusama’s tagline – “Expect Chaos“
Usage Instructions
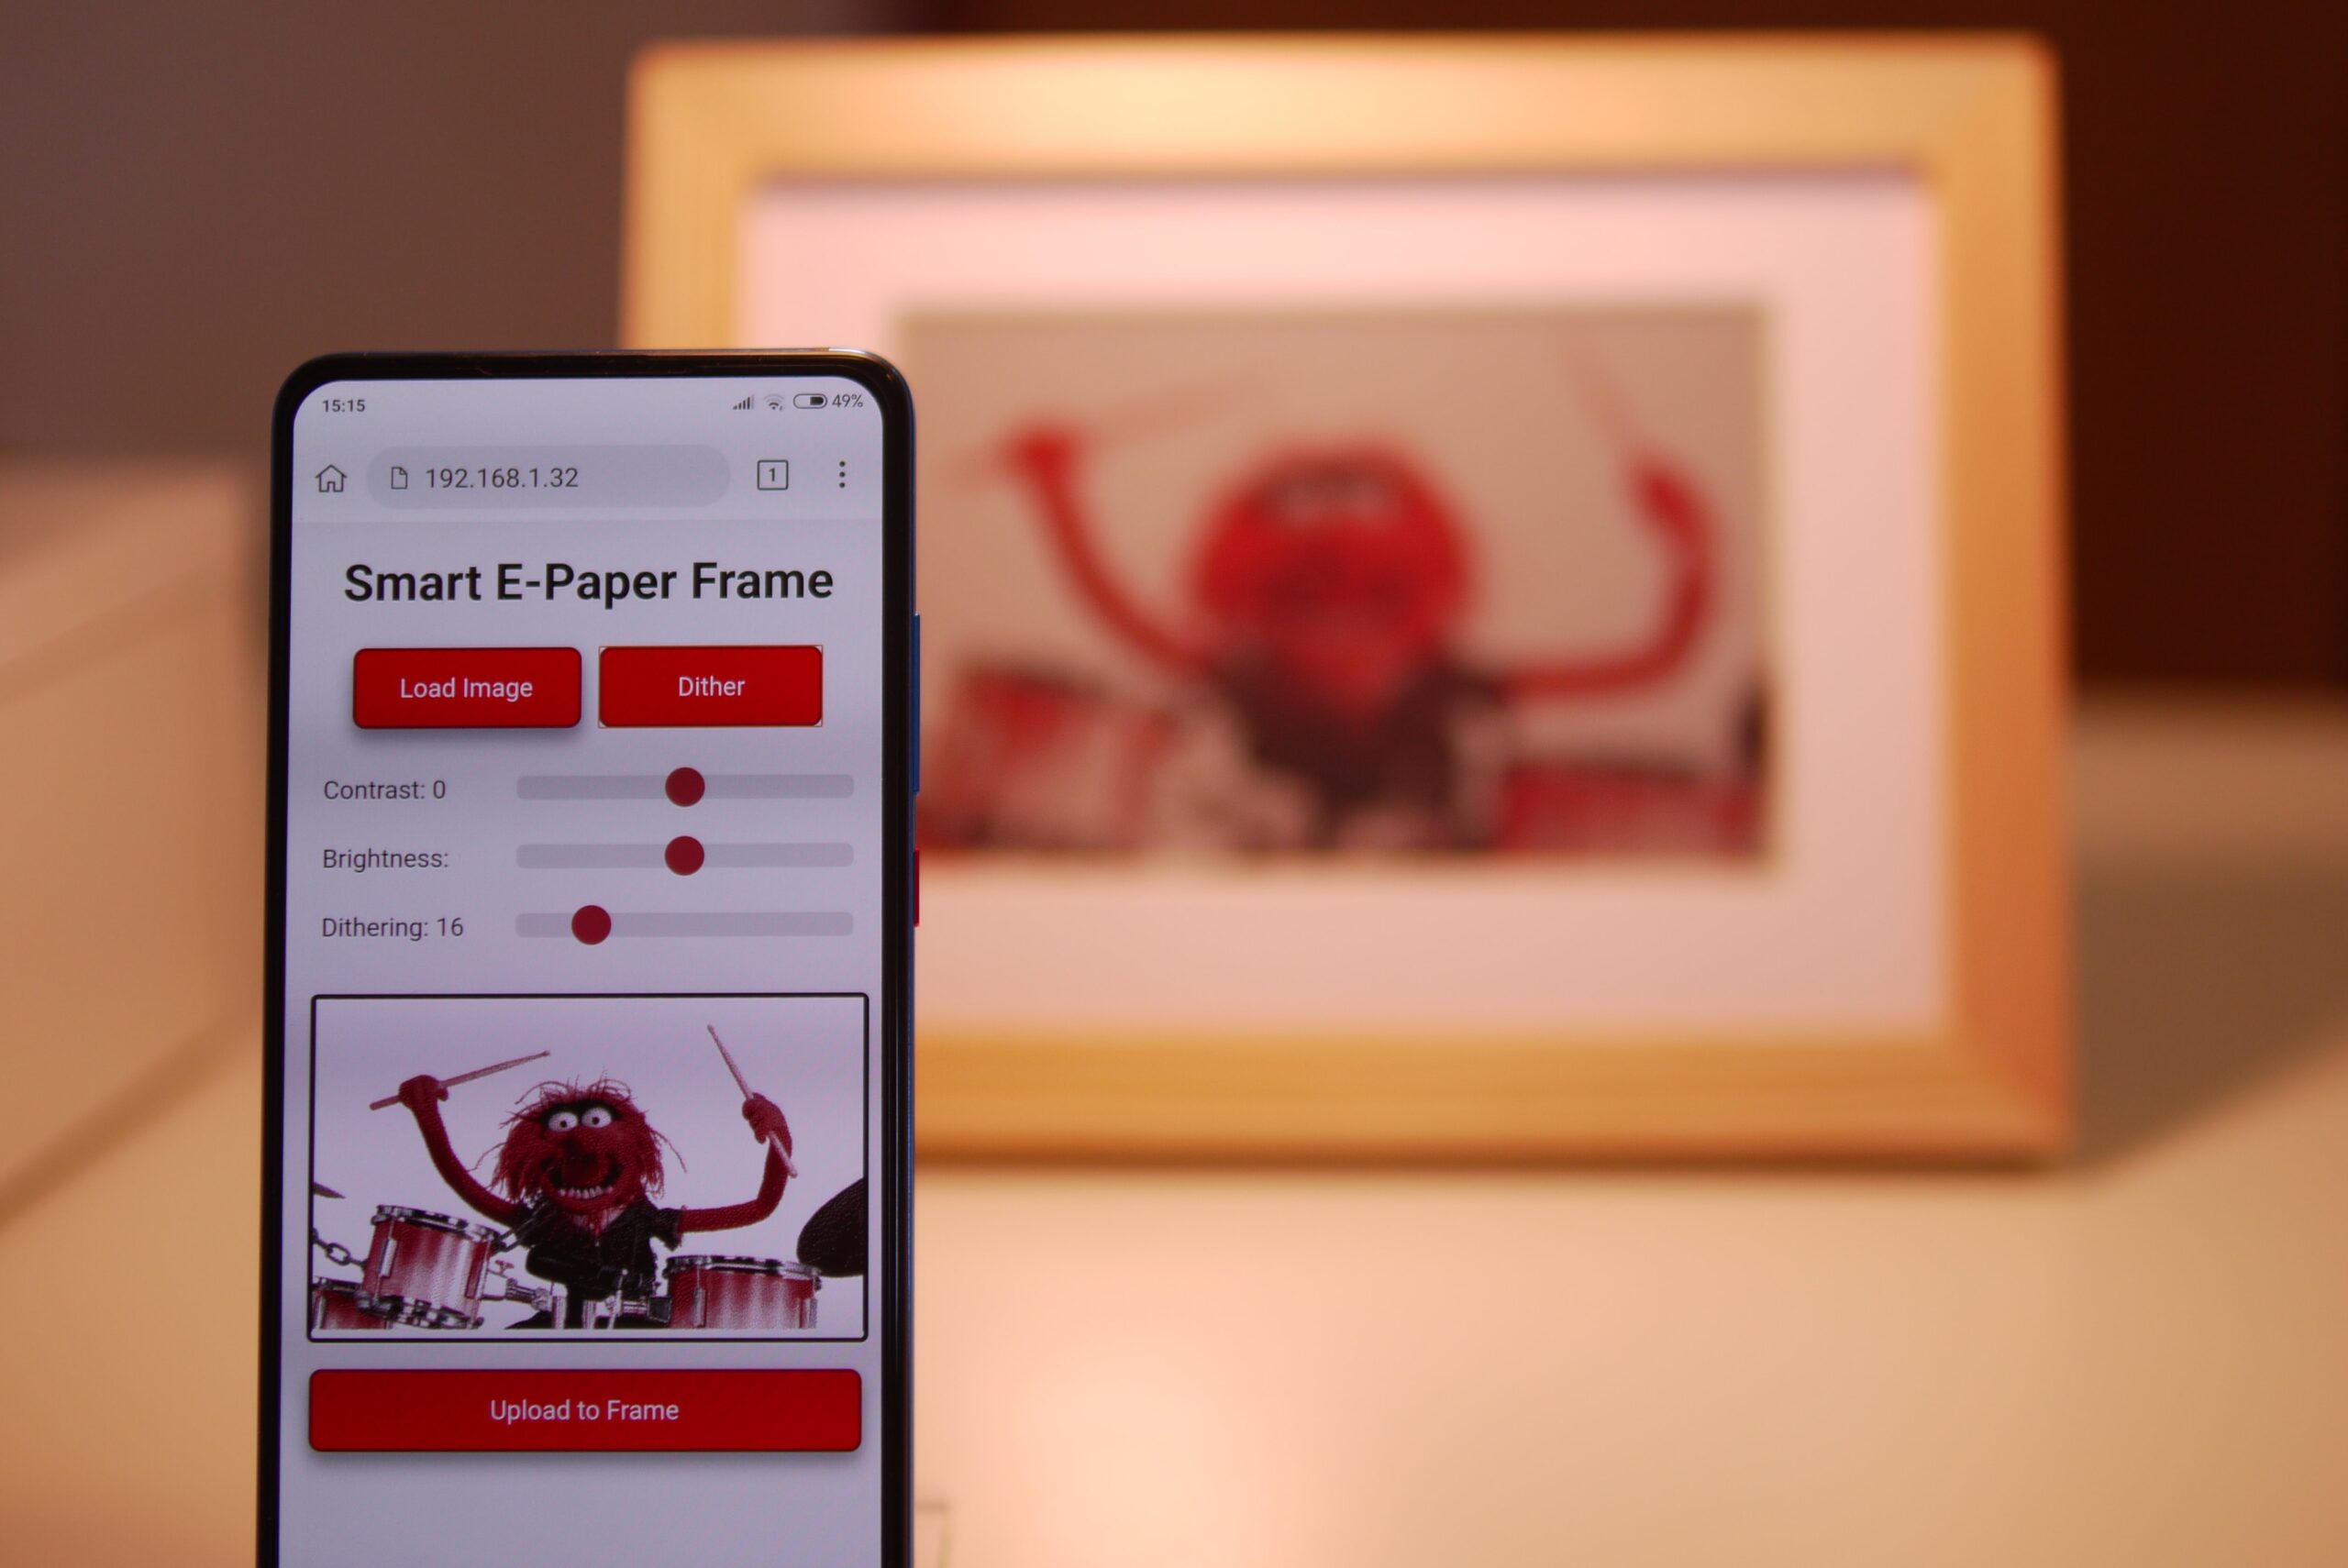
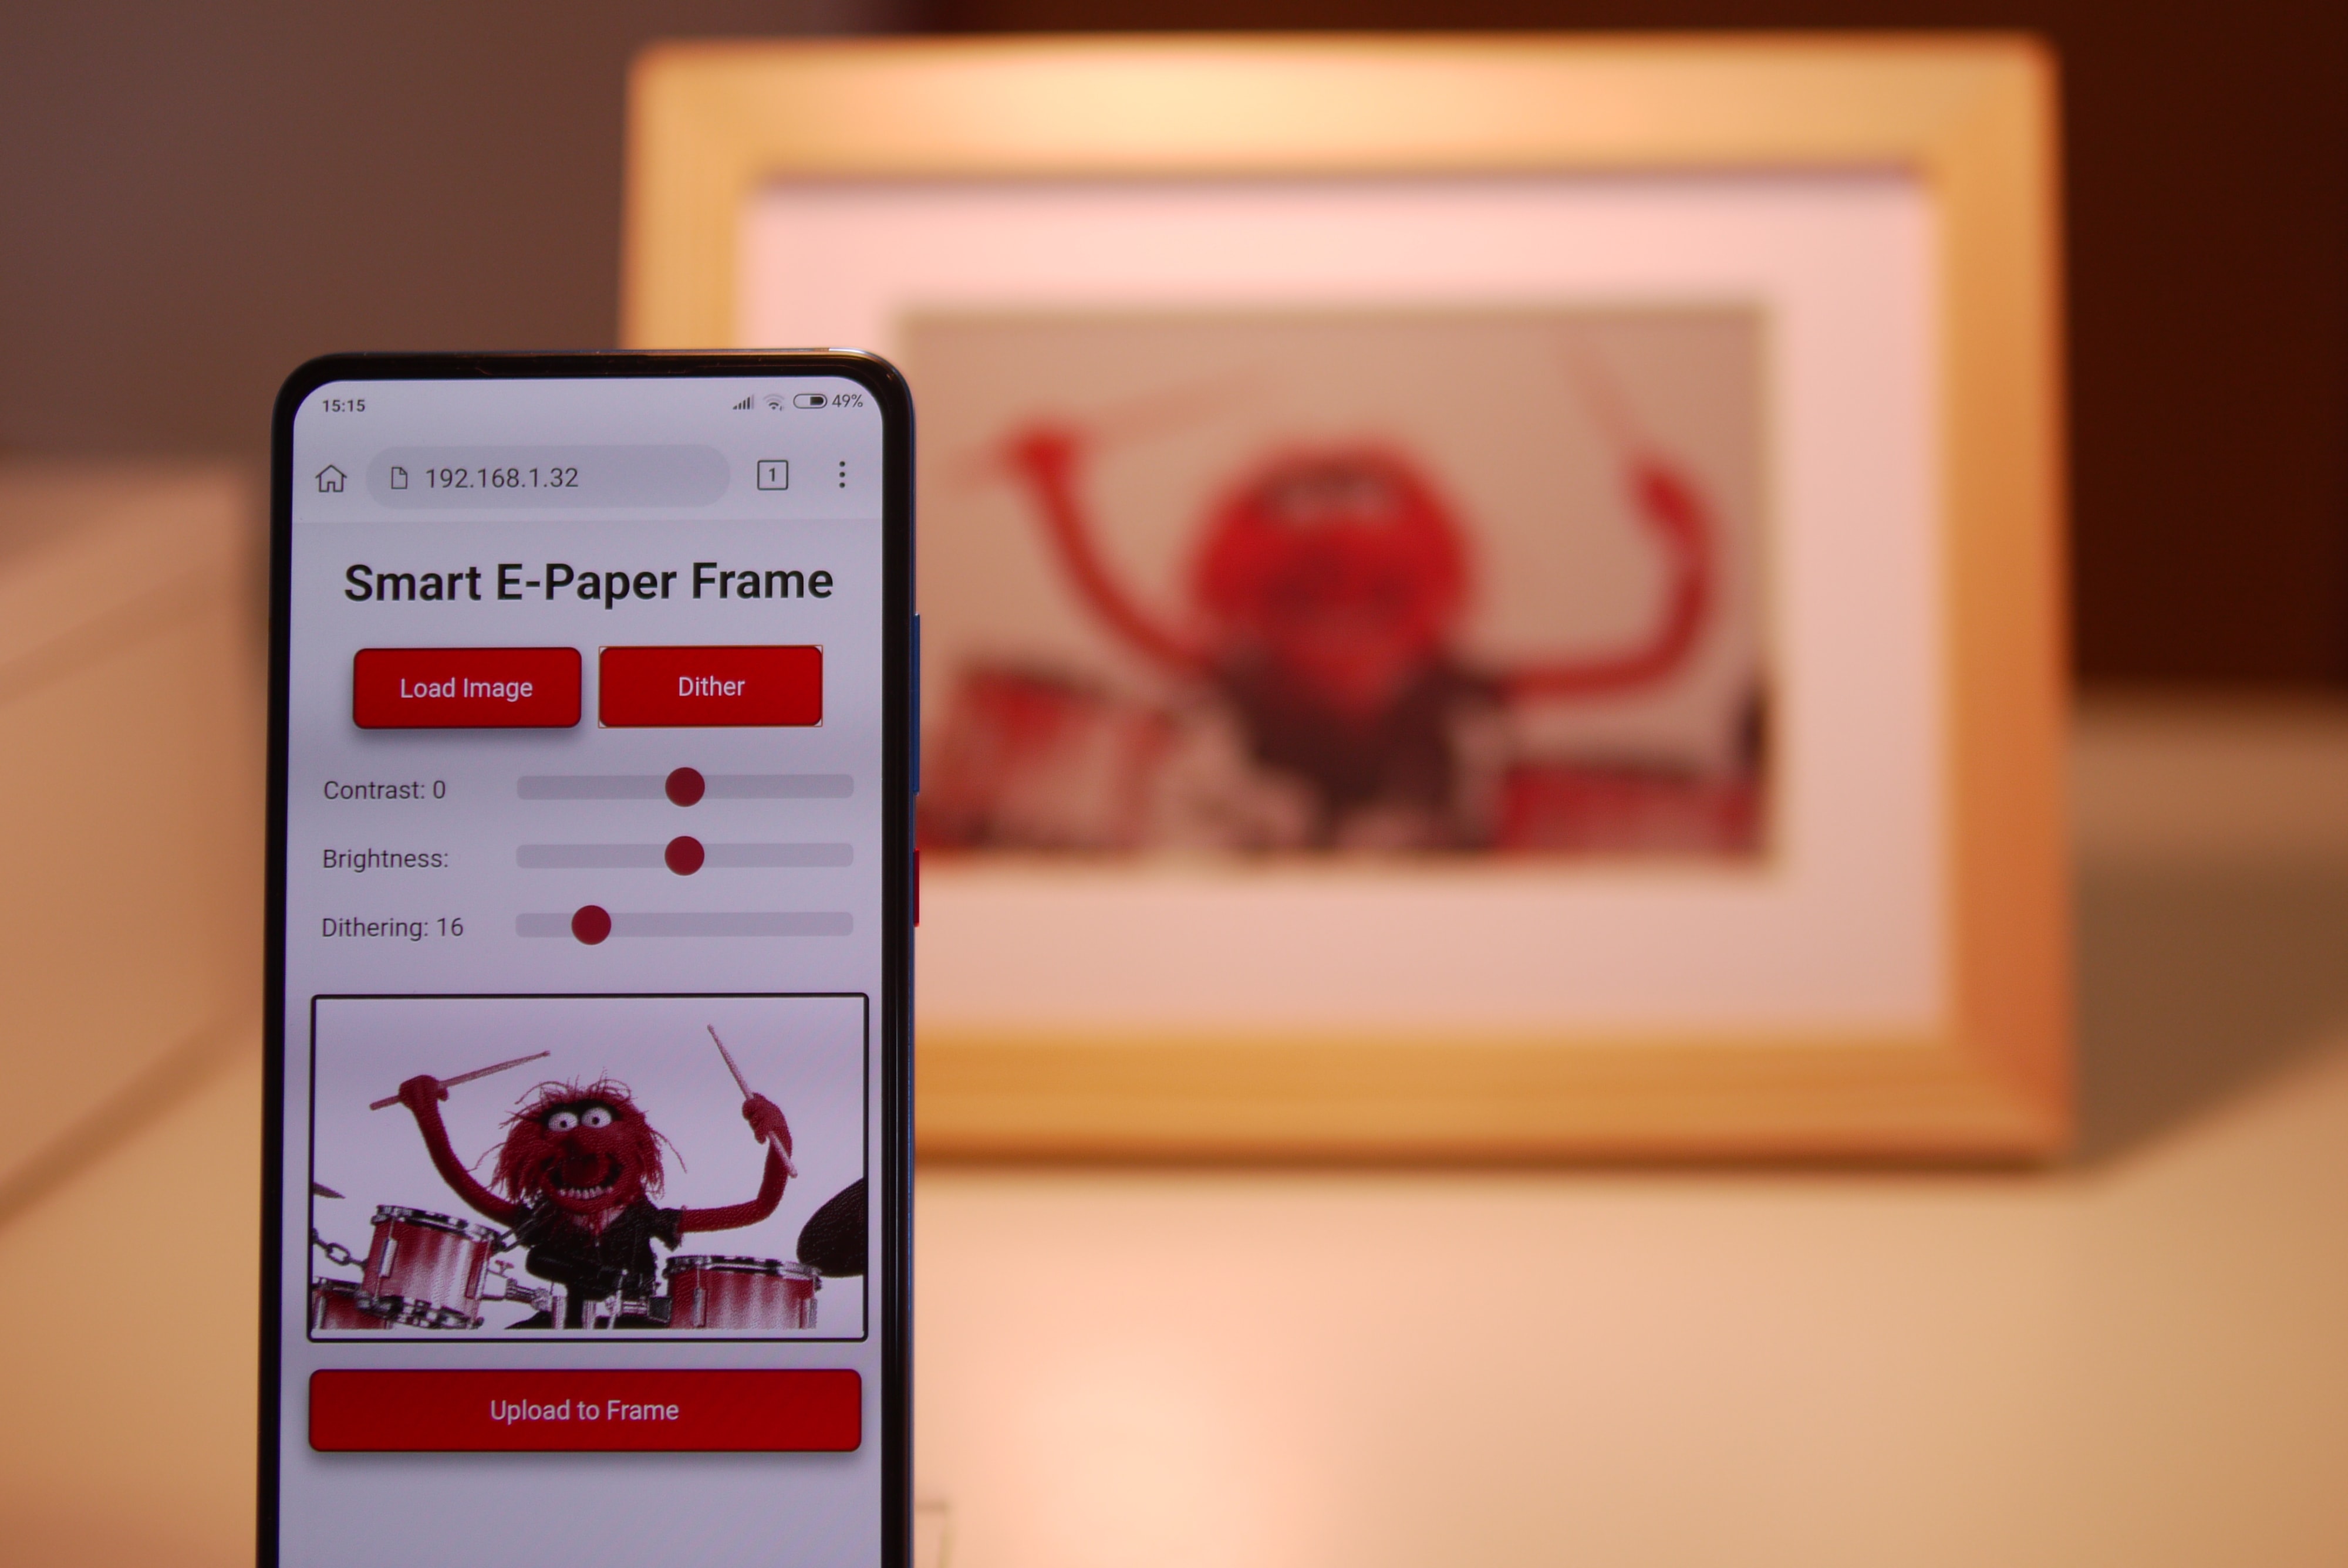
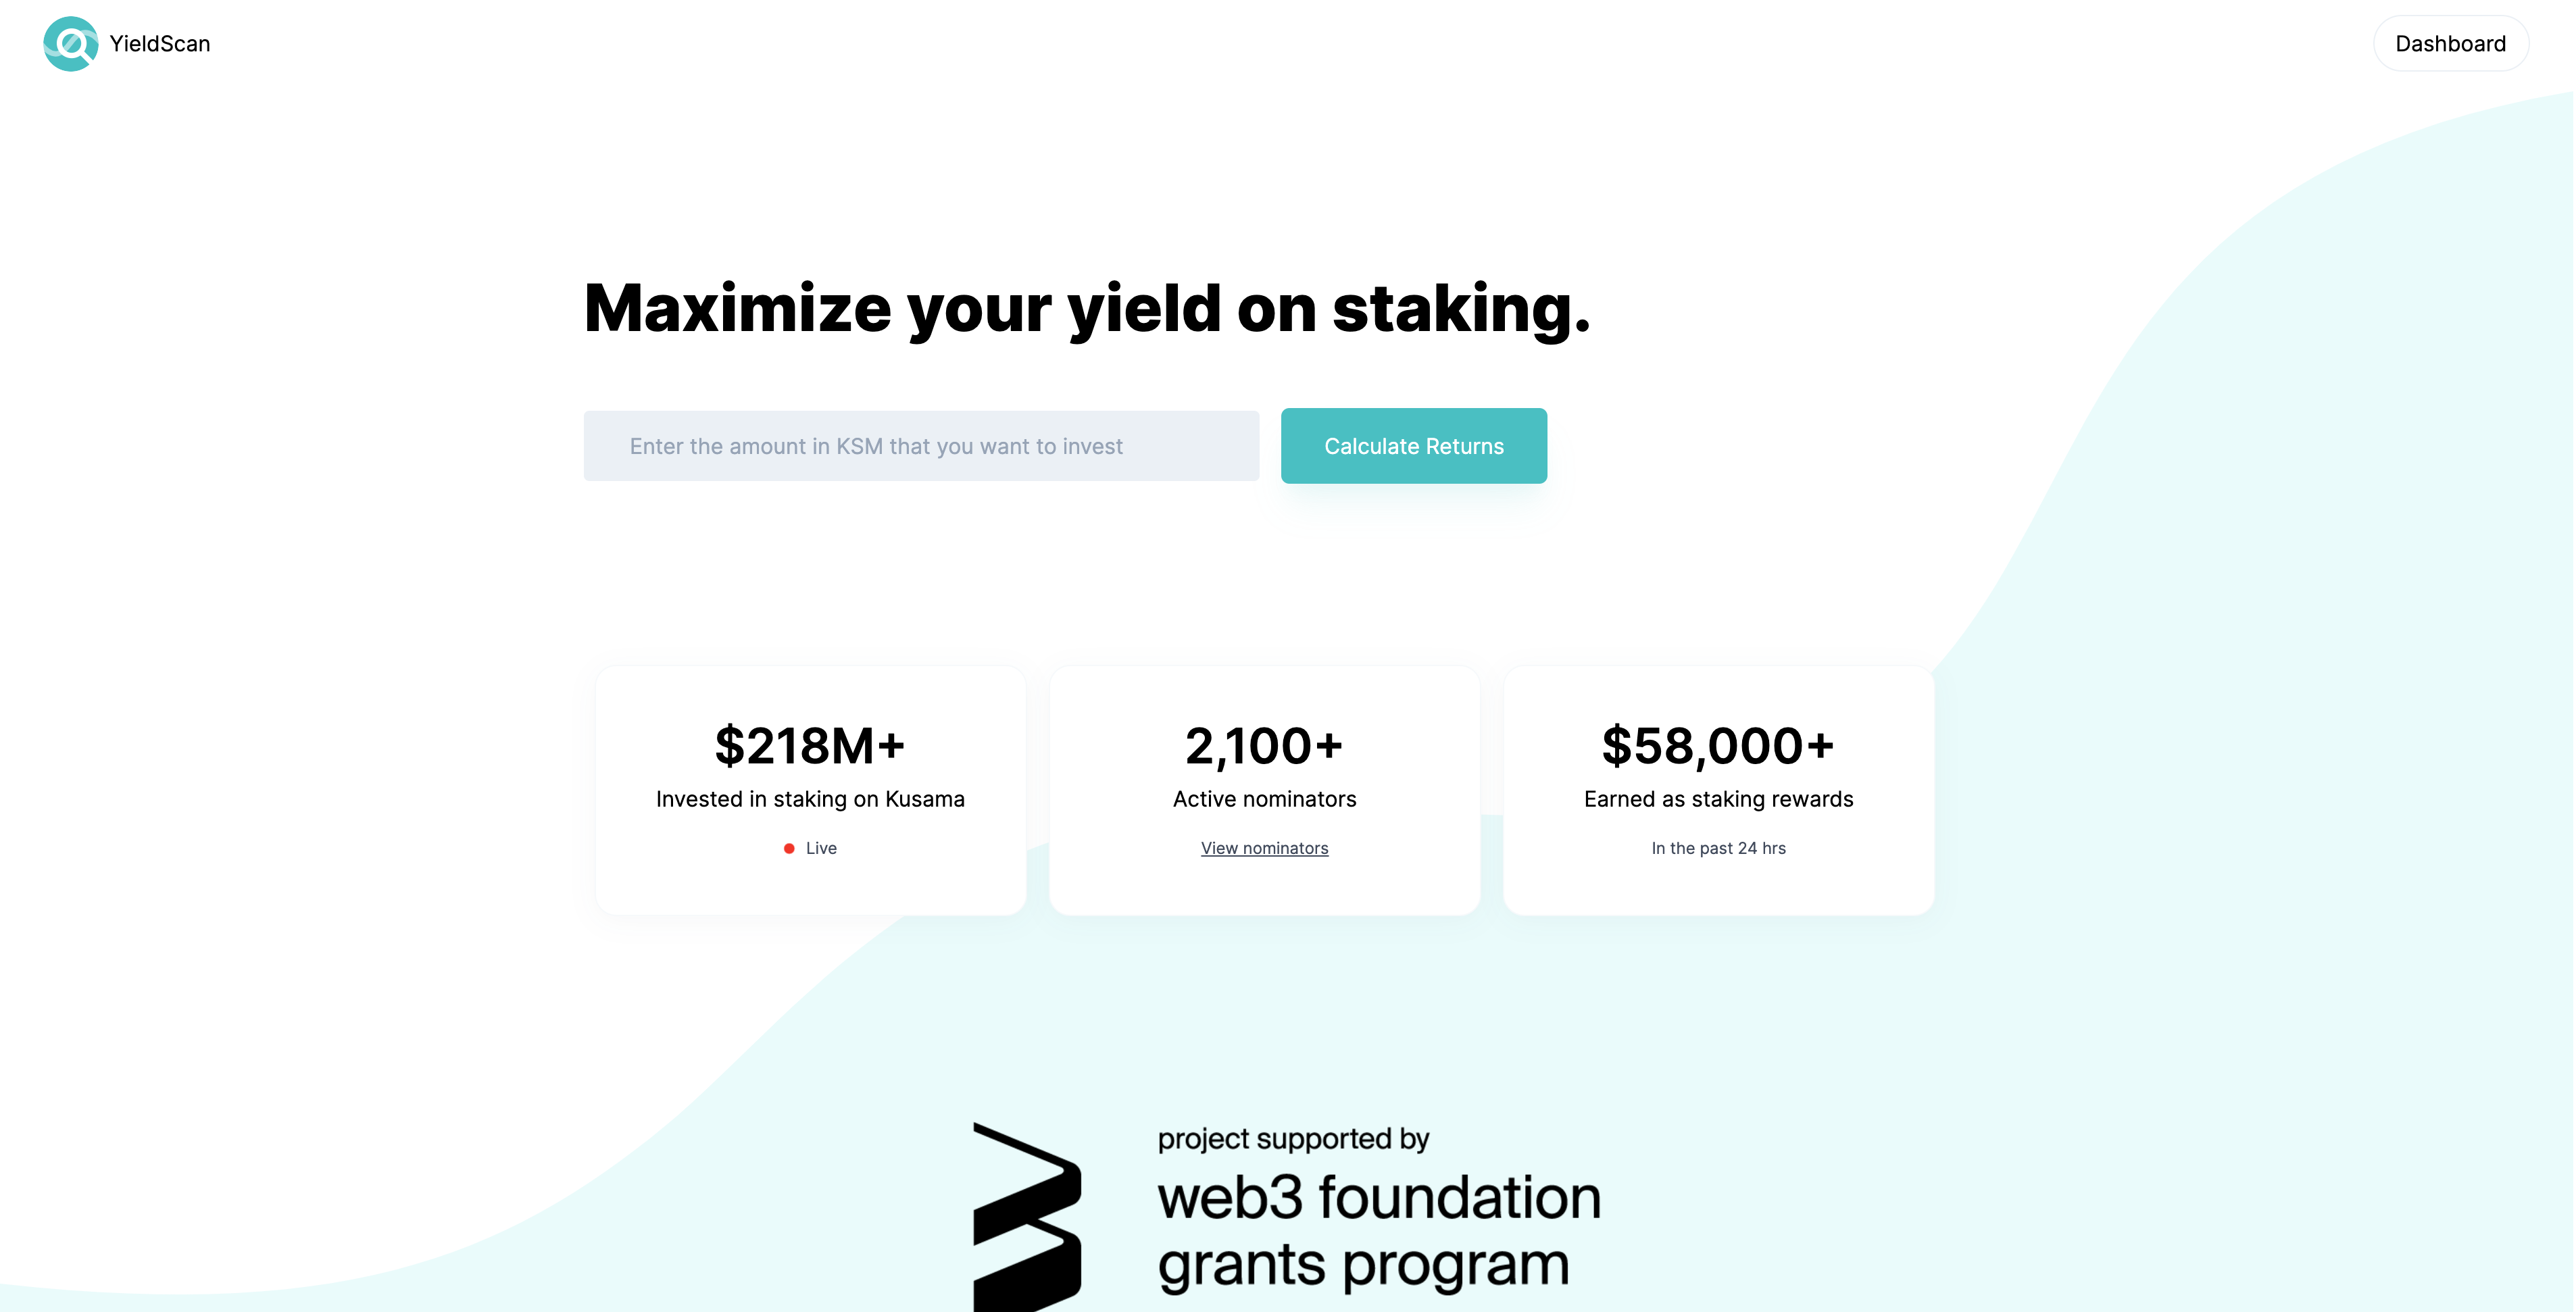
Go to YieldScan. You will be greeted with the following page:
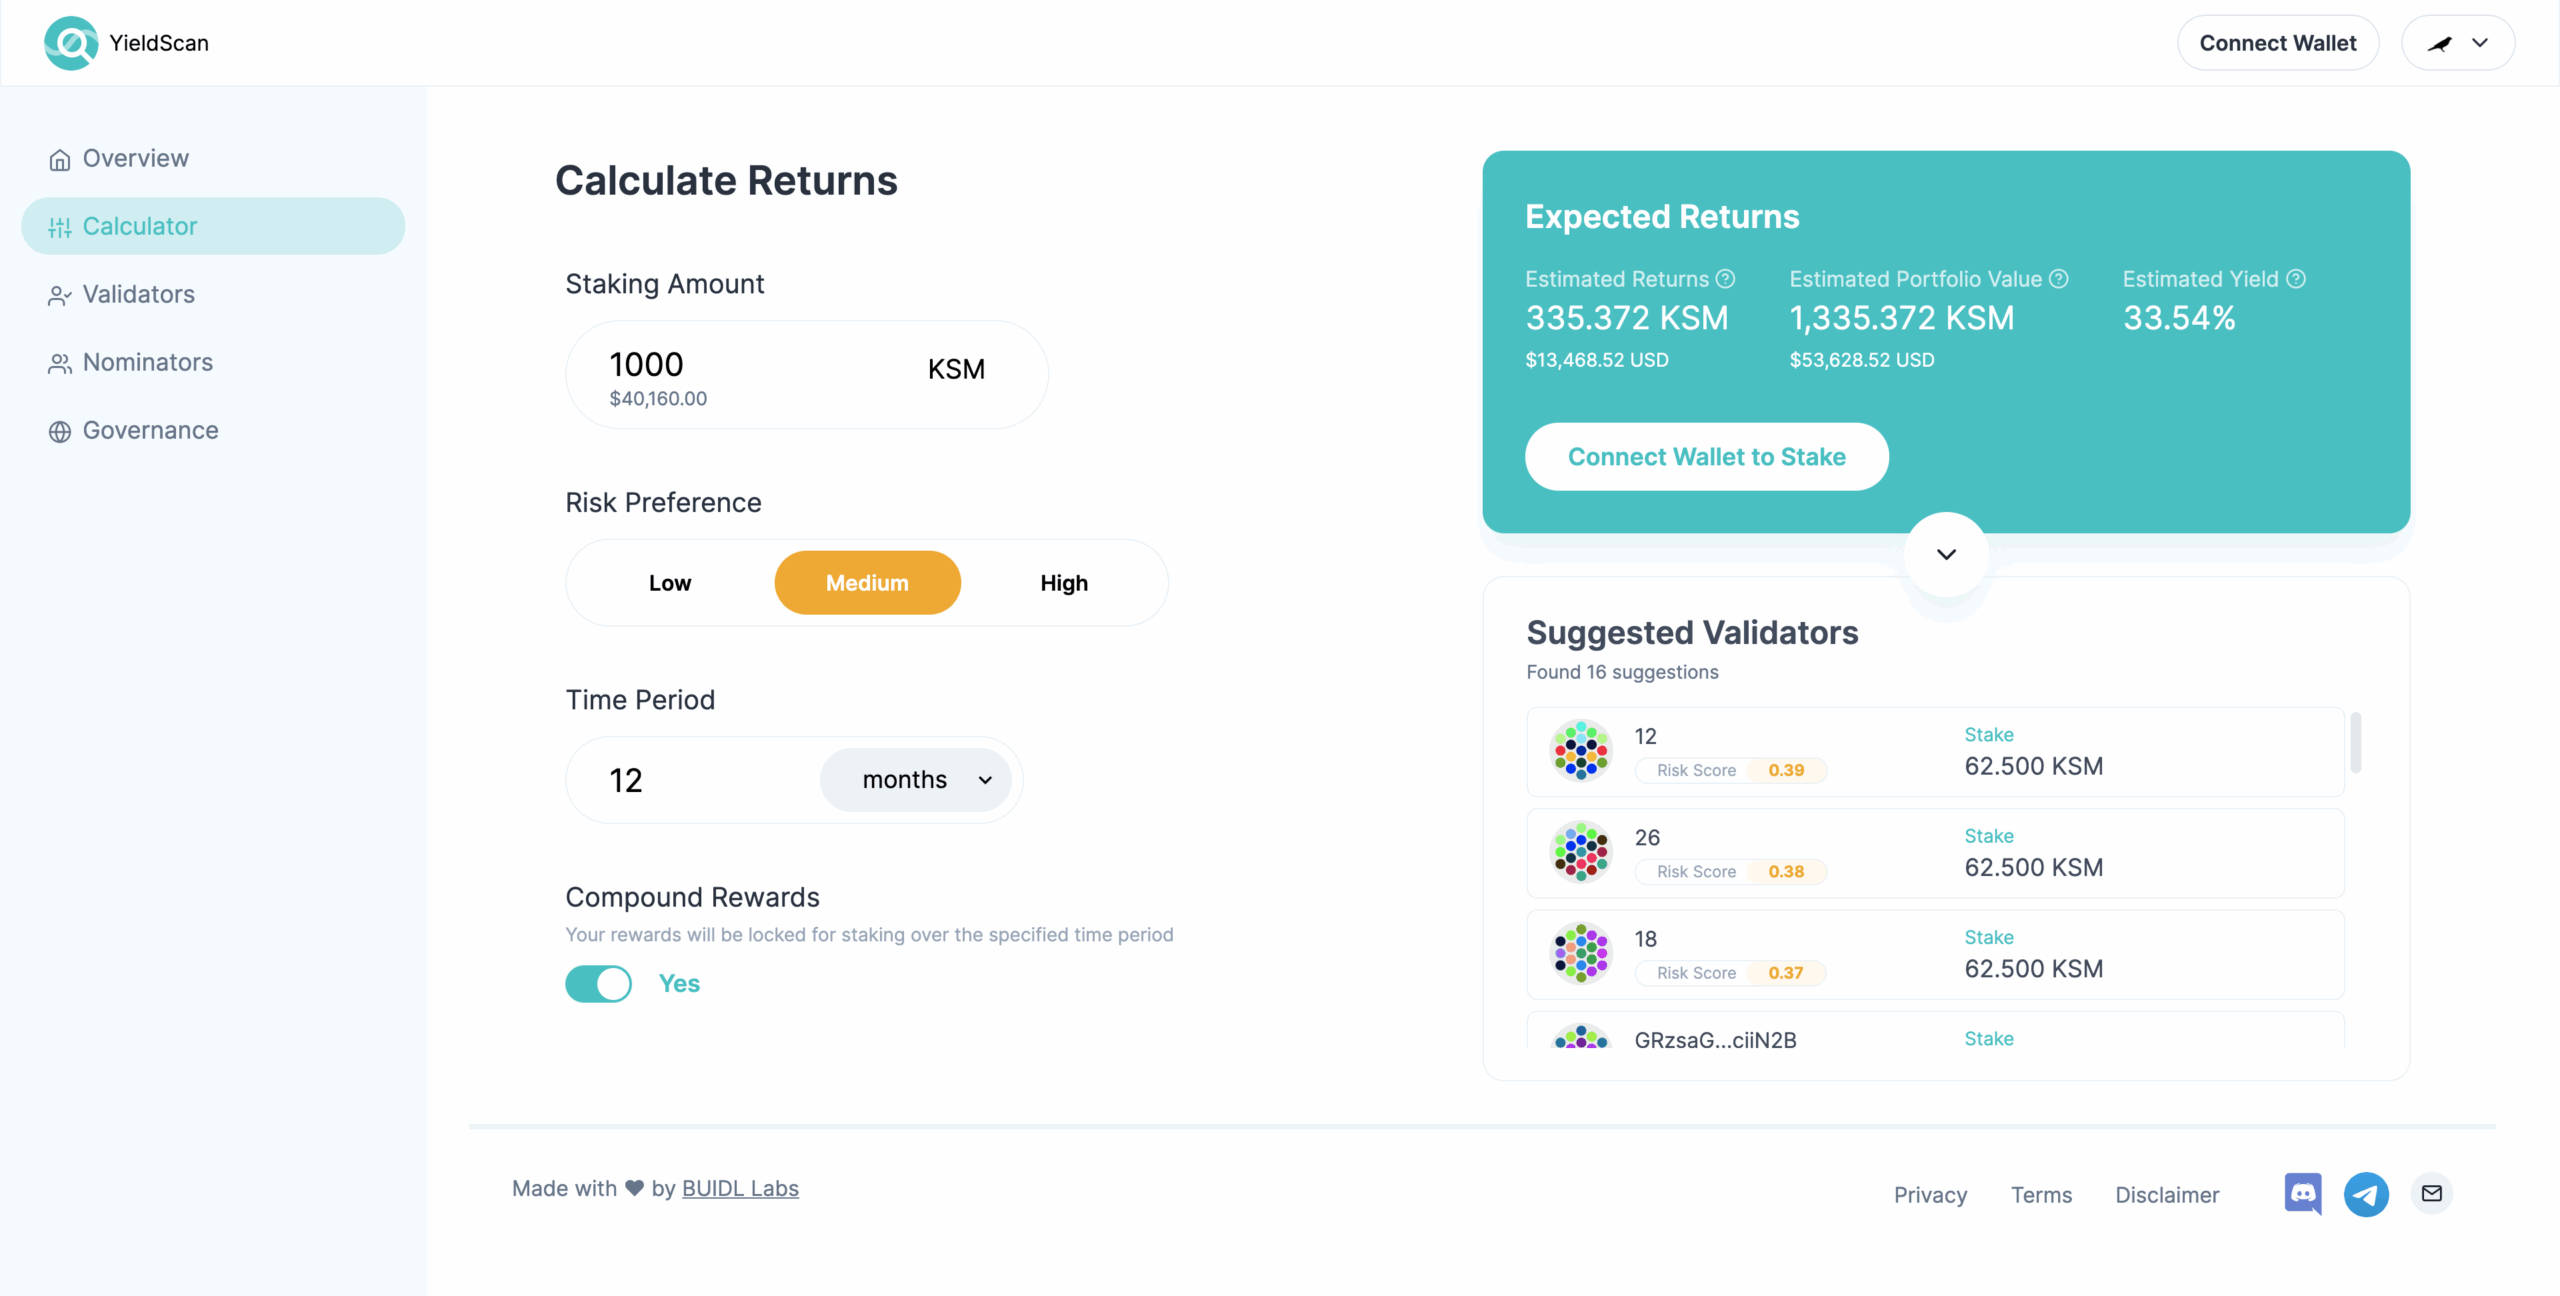
Enter your budget and click “Calculate Returns”. You will be redirected to the returns calculator, which will show you your potential earnings and allow you to tweak your staking preferences to get varied results:
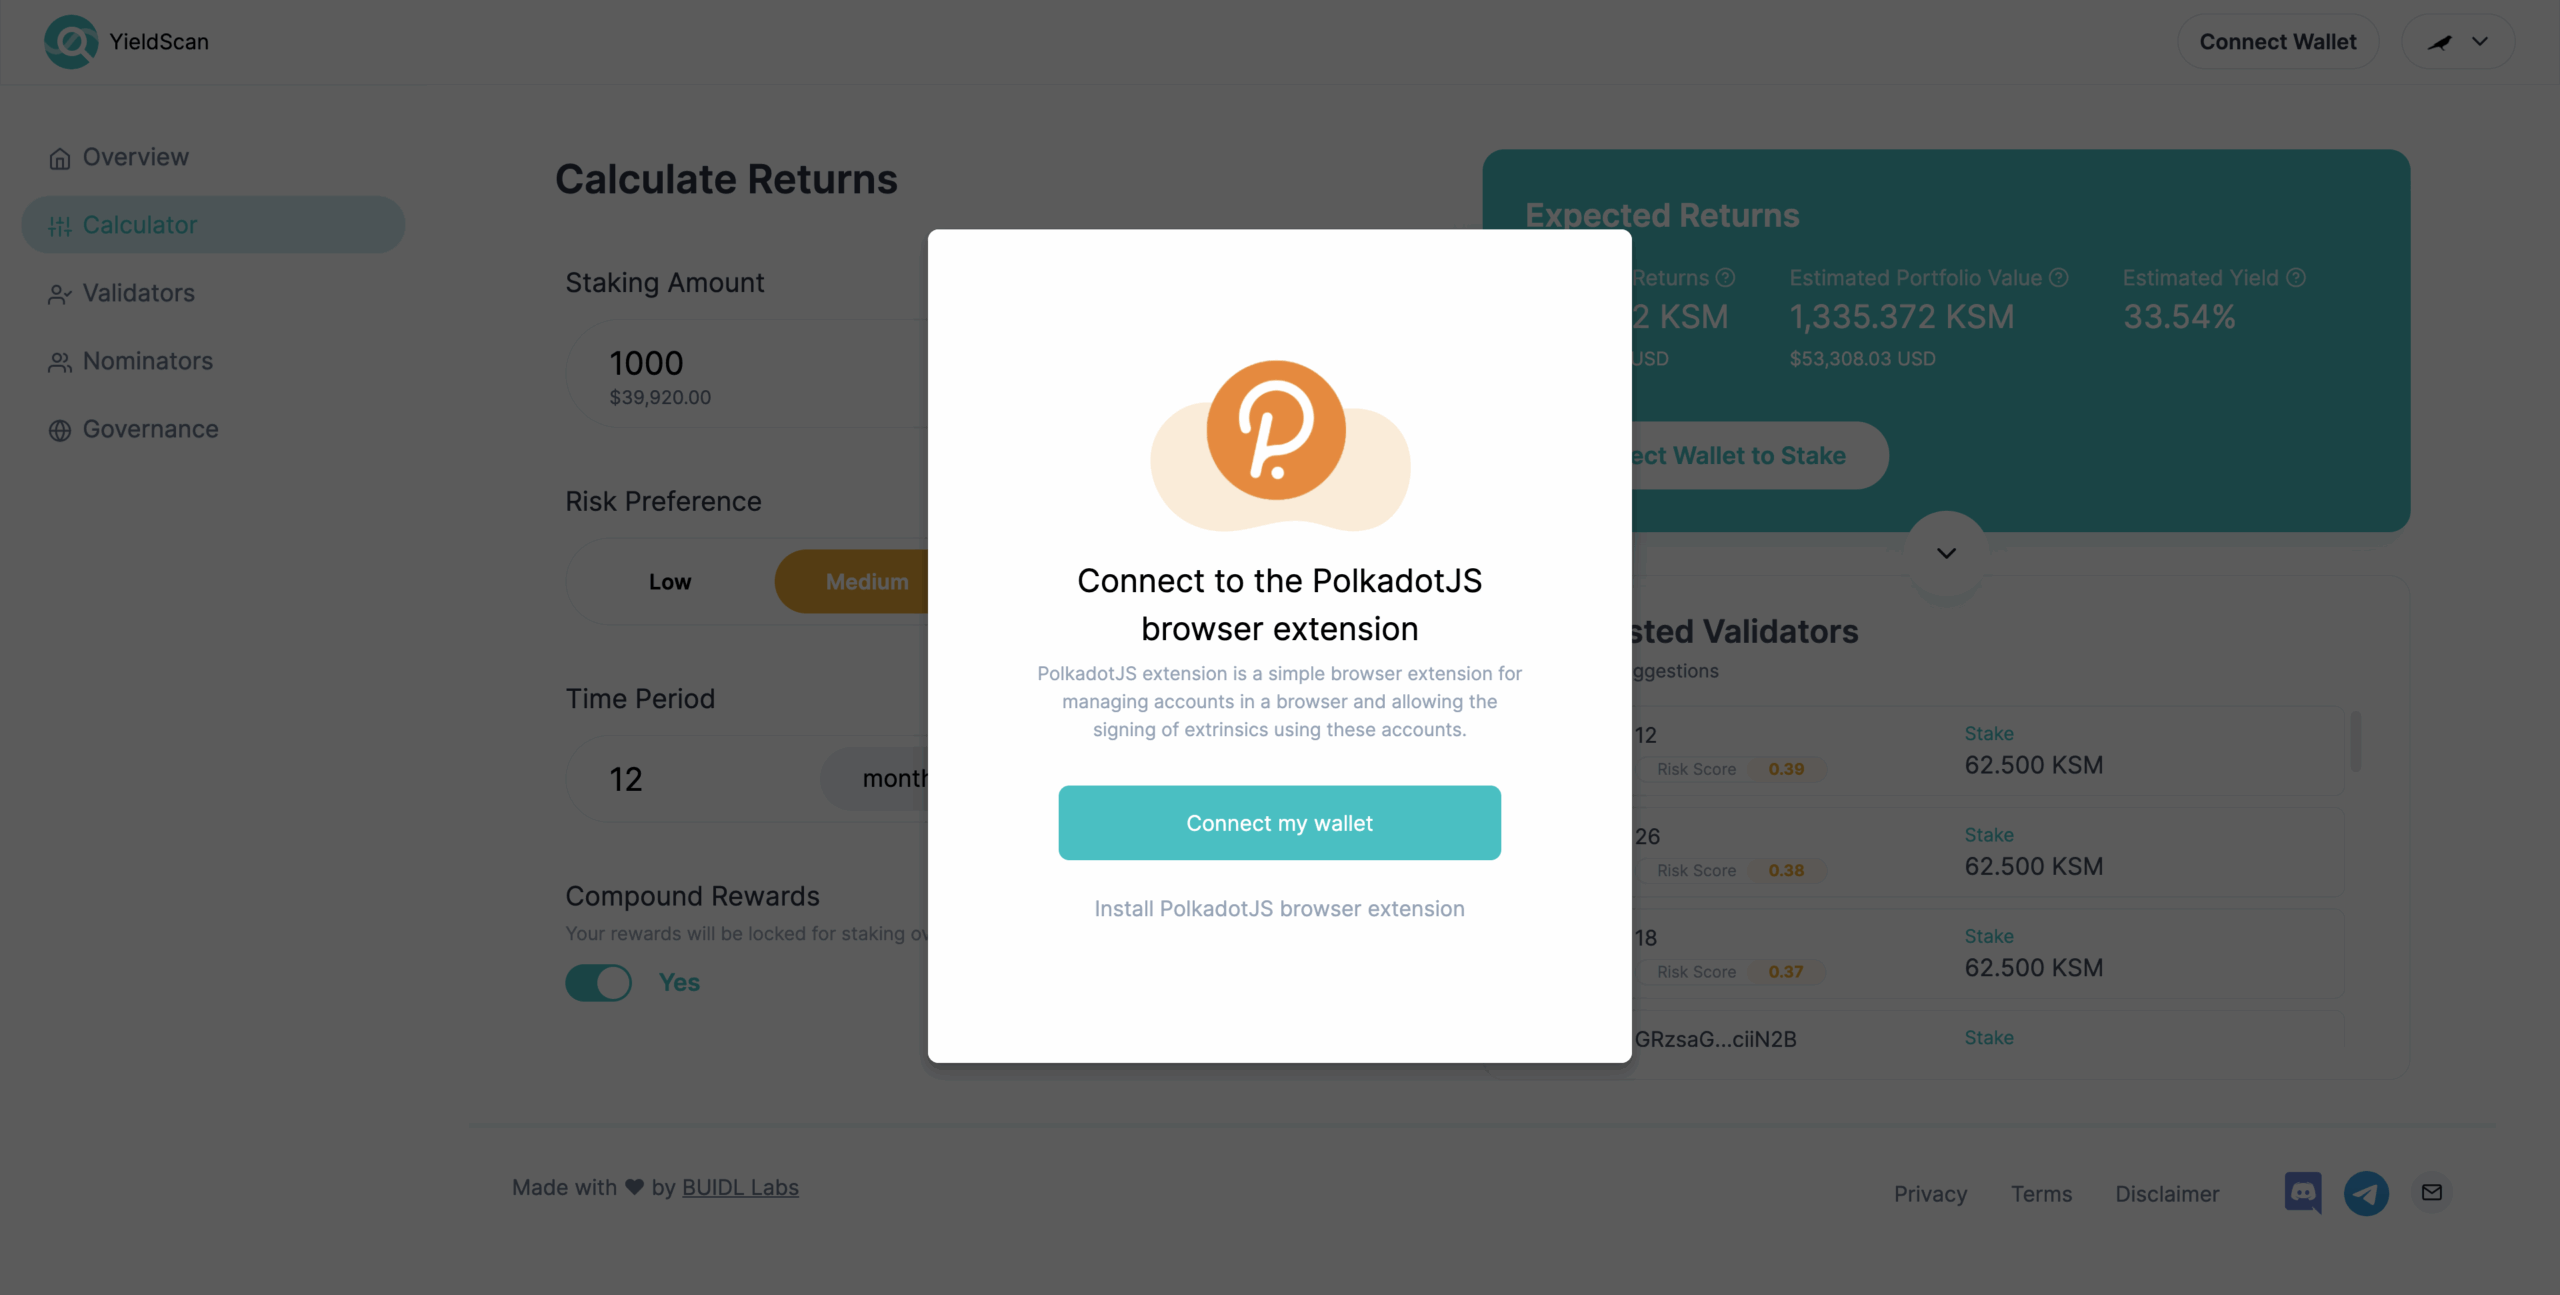
Once you’re satisfied with your preferences and inputs, simply connect your PolkadotJS wallet by clicking either the “Connect wallet” button on the header or by clicking the “Connect wallet to stake” button in returns card. This will prompt you connect your wallet:
Click on “Connect my wallet”. You will be prompted by PolkadotJS to authorize YieldScan – this authorization is needed for us to prompt you to sign transactions – this keeps your keys safe and allows you to be in control of whether or not you want any transaction to be sent to the chain.
Once you’ve authorized the app, simply select an account for staking and you’ll be ready to proceed forward from the return calculator.
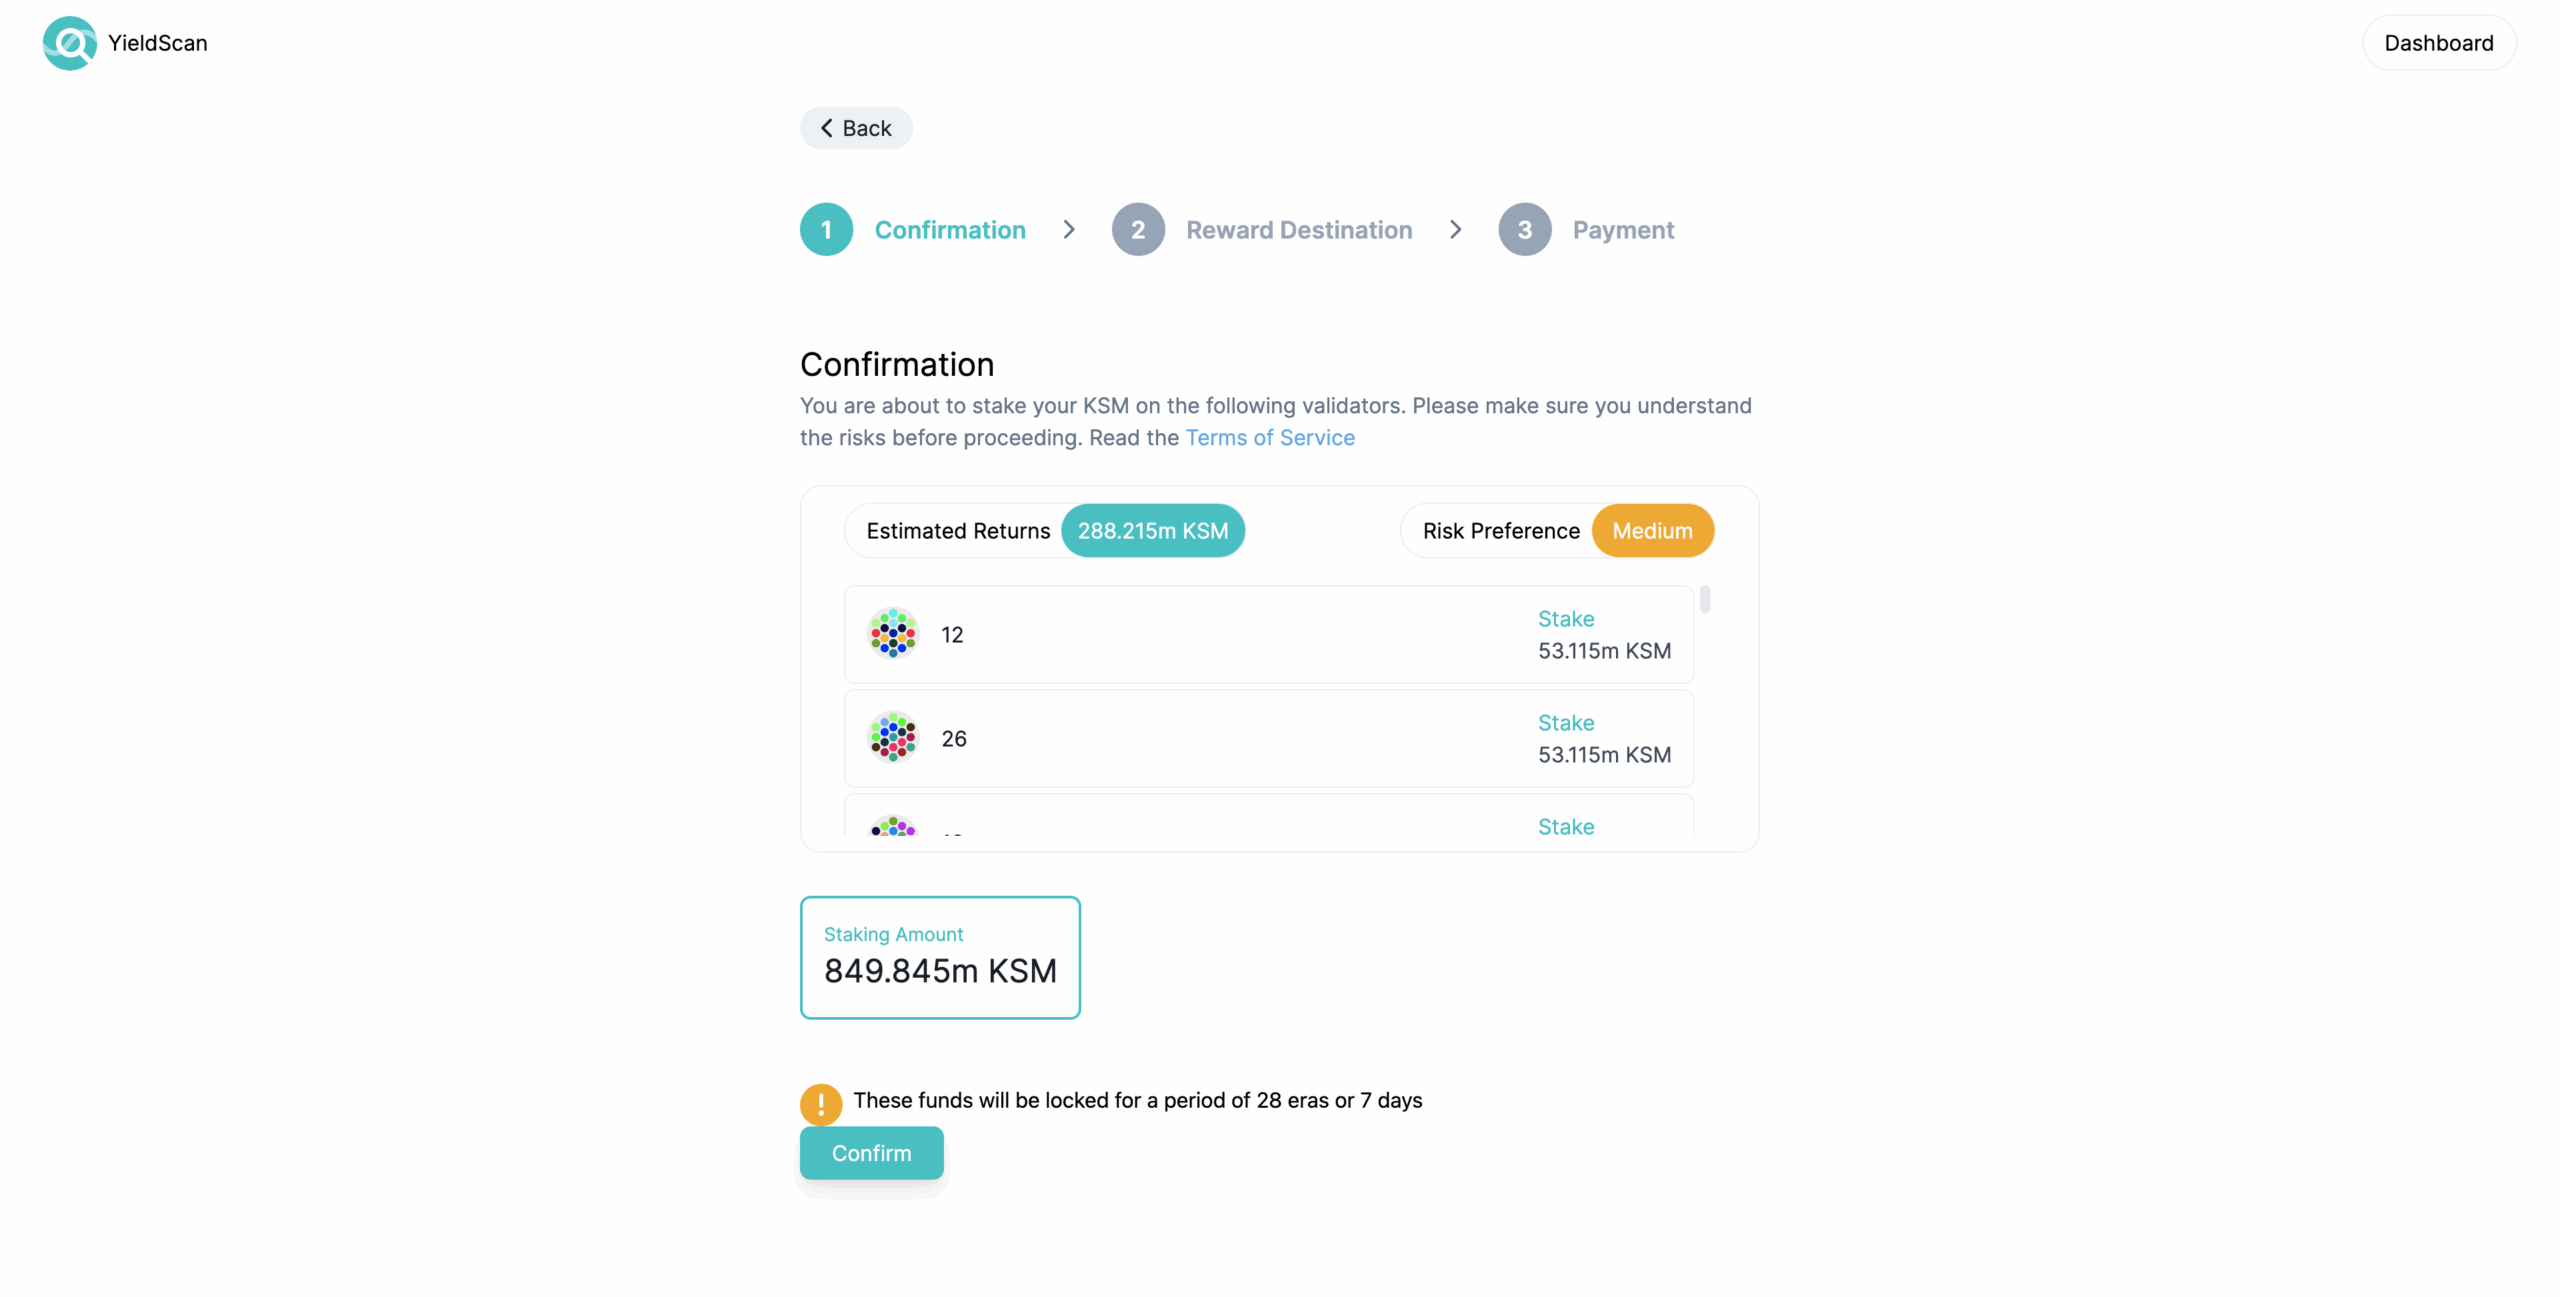
Simply click the “Stake” button on the returns calculator and you’ll be redirected to the payment confirmation page:
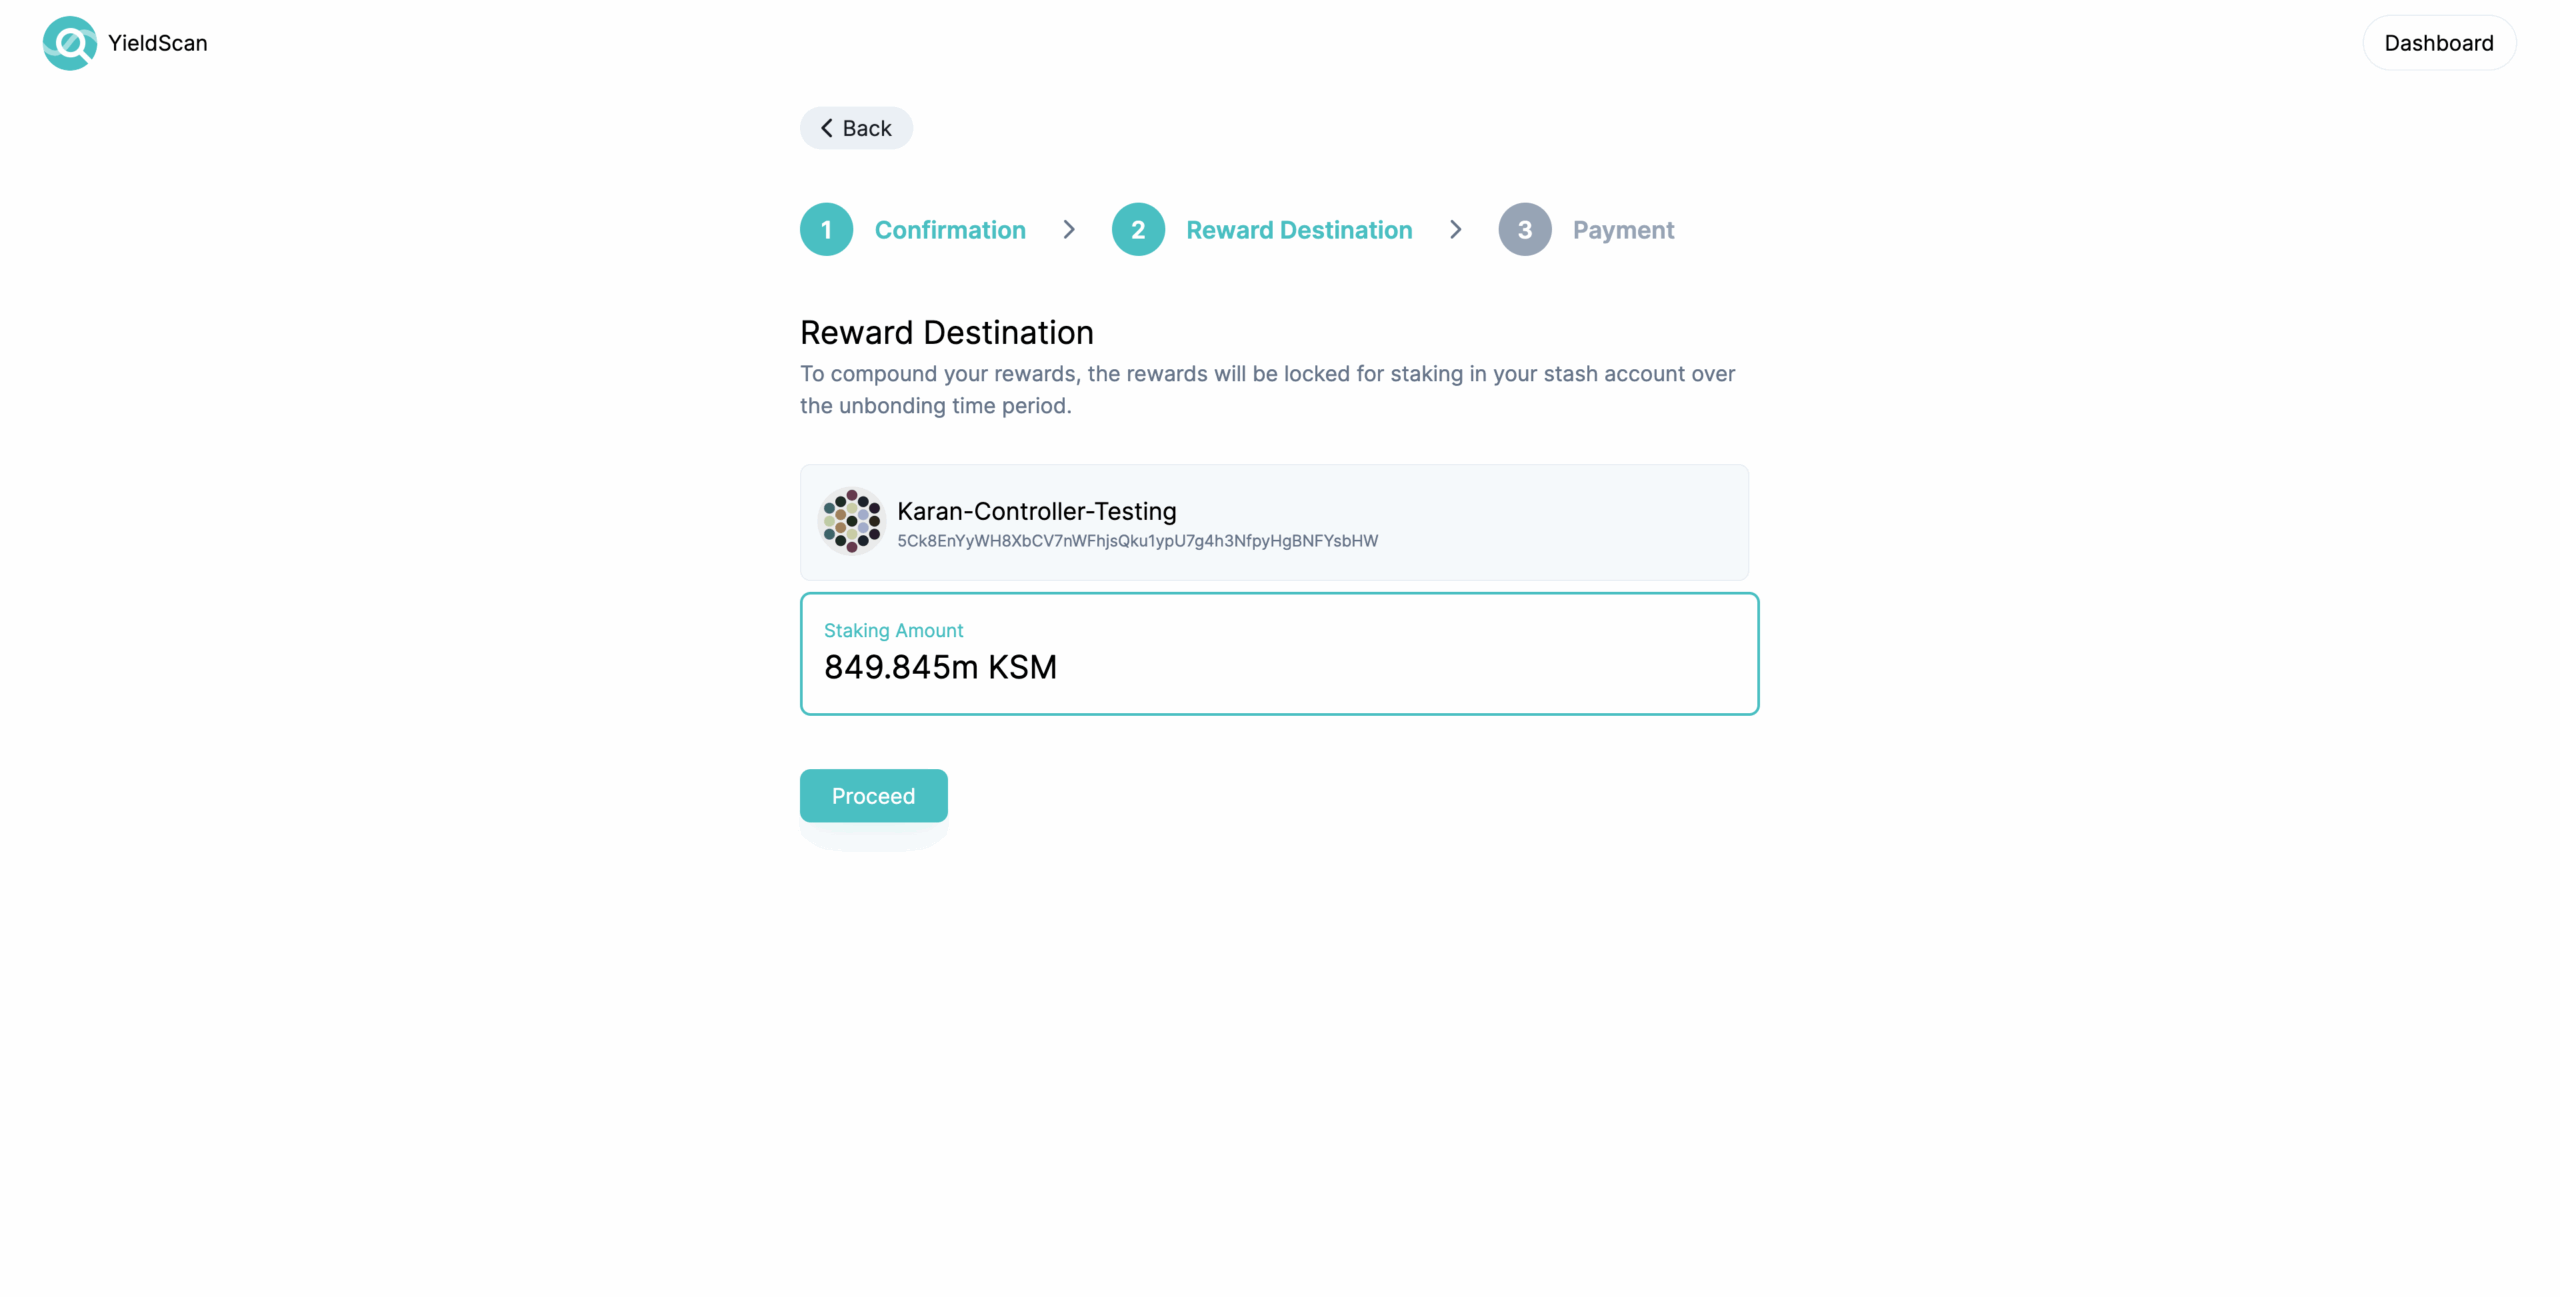
Once you’re satisfied with the selected preferences, click on confirm and read the terms of service – please make sure you understand the risks before you proceed any further. Once you understand the risks and agree to the terms, you’ll be taken to the reward destination selection step. If you have decided to compound your rewards on the calculator, you can simply proceed forward. If you decided to not compound your rewards and plan to use a separate controller for staking, then select the reward destination of your choice (i.e. stash or controller) where you would like for you rewards to be awarded and then proceed.
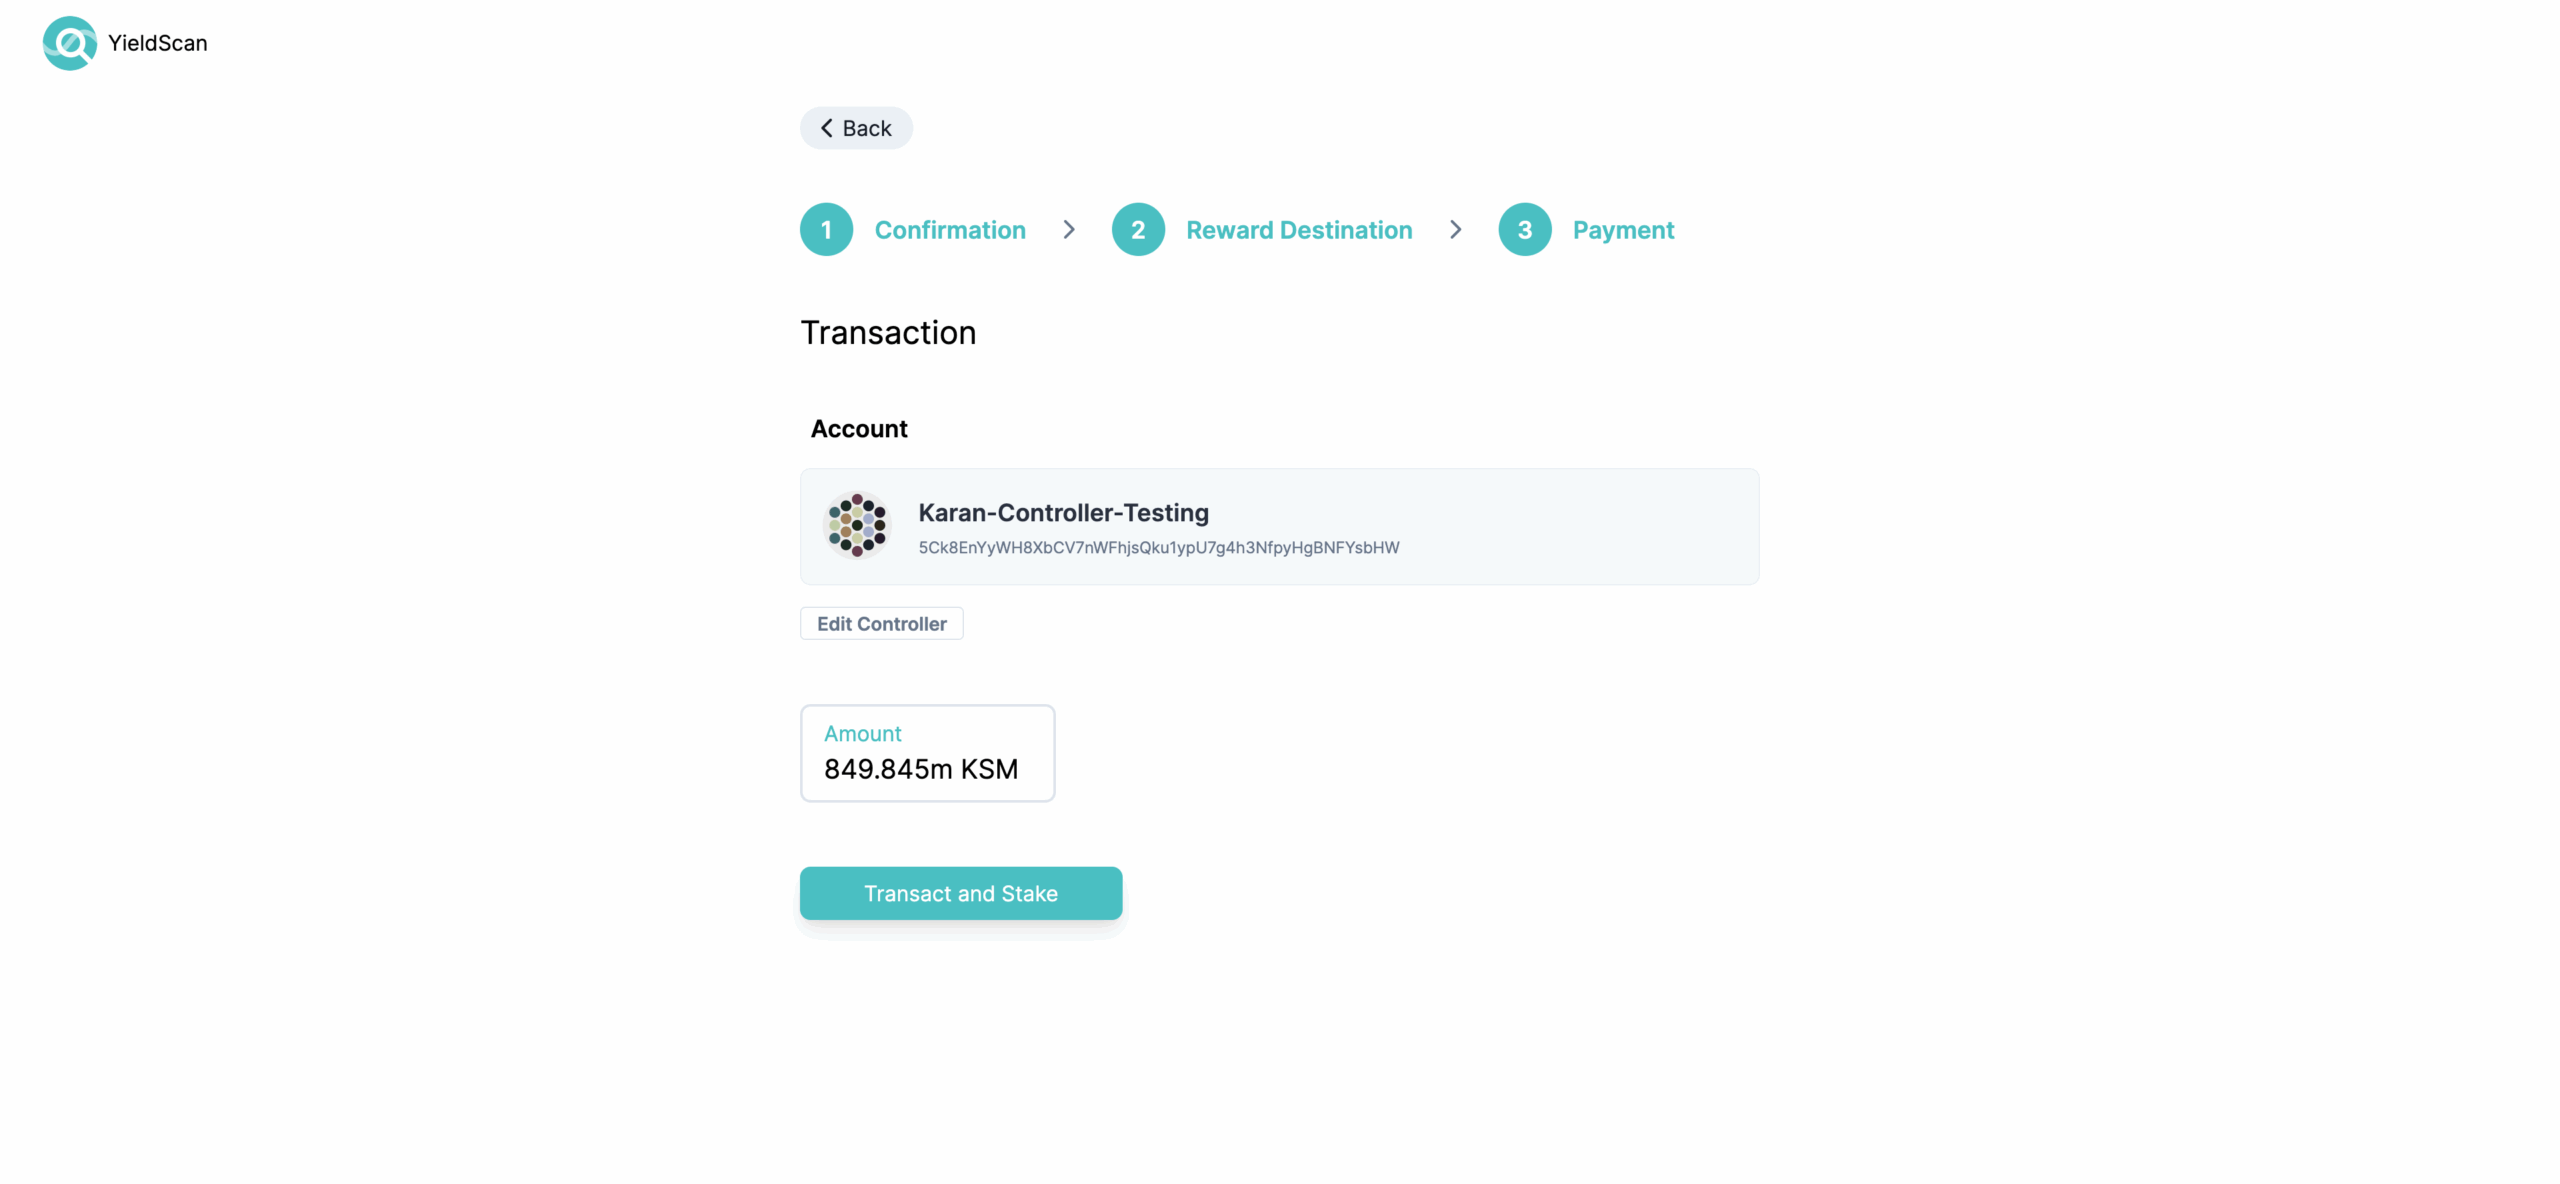
Finally, you’ll be asked to confirm the staking amount and the account(s) being used for nomination. You can edit the controller here if you like or use the default selection – i.e. same account for stash as well as controller.
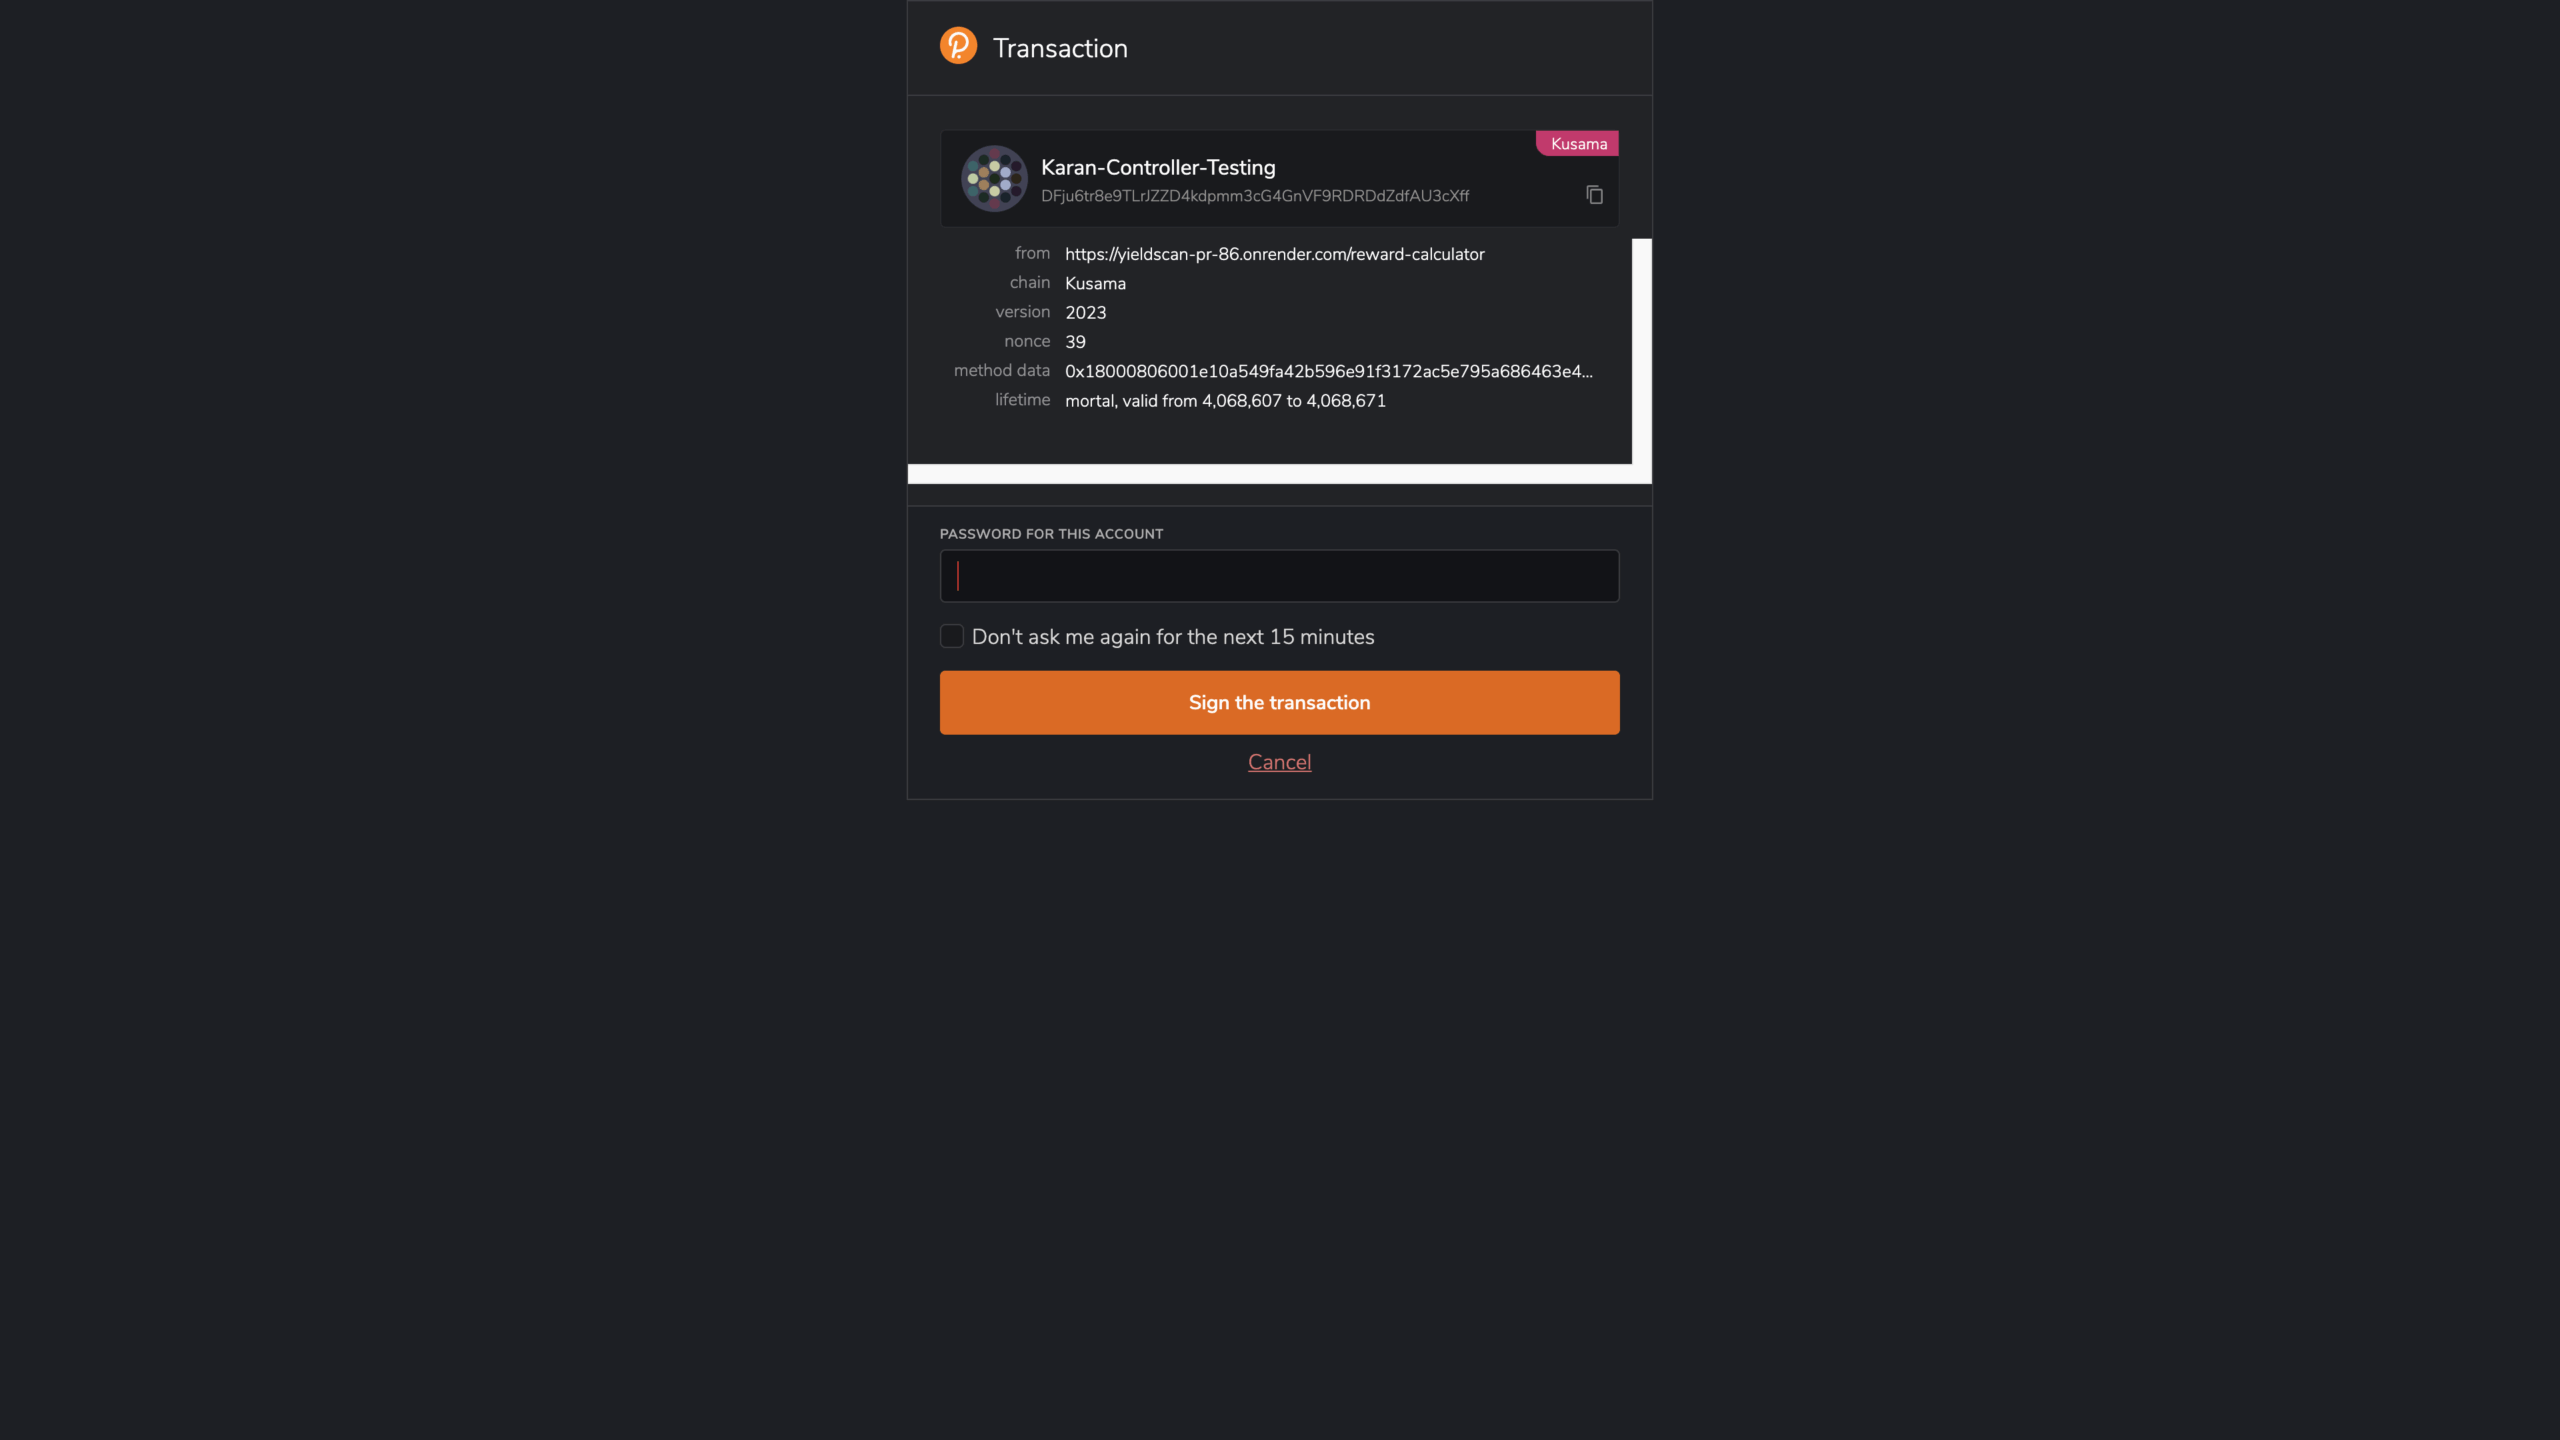
Click on “Transact and Stake” and you’ll be prompted by the PolkadotJS extension to sign the transaction:
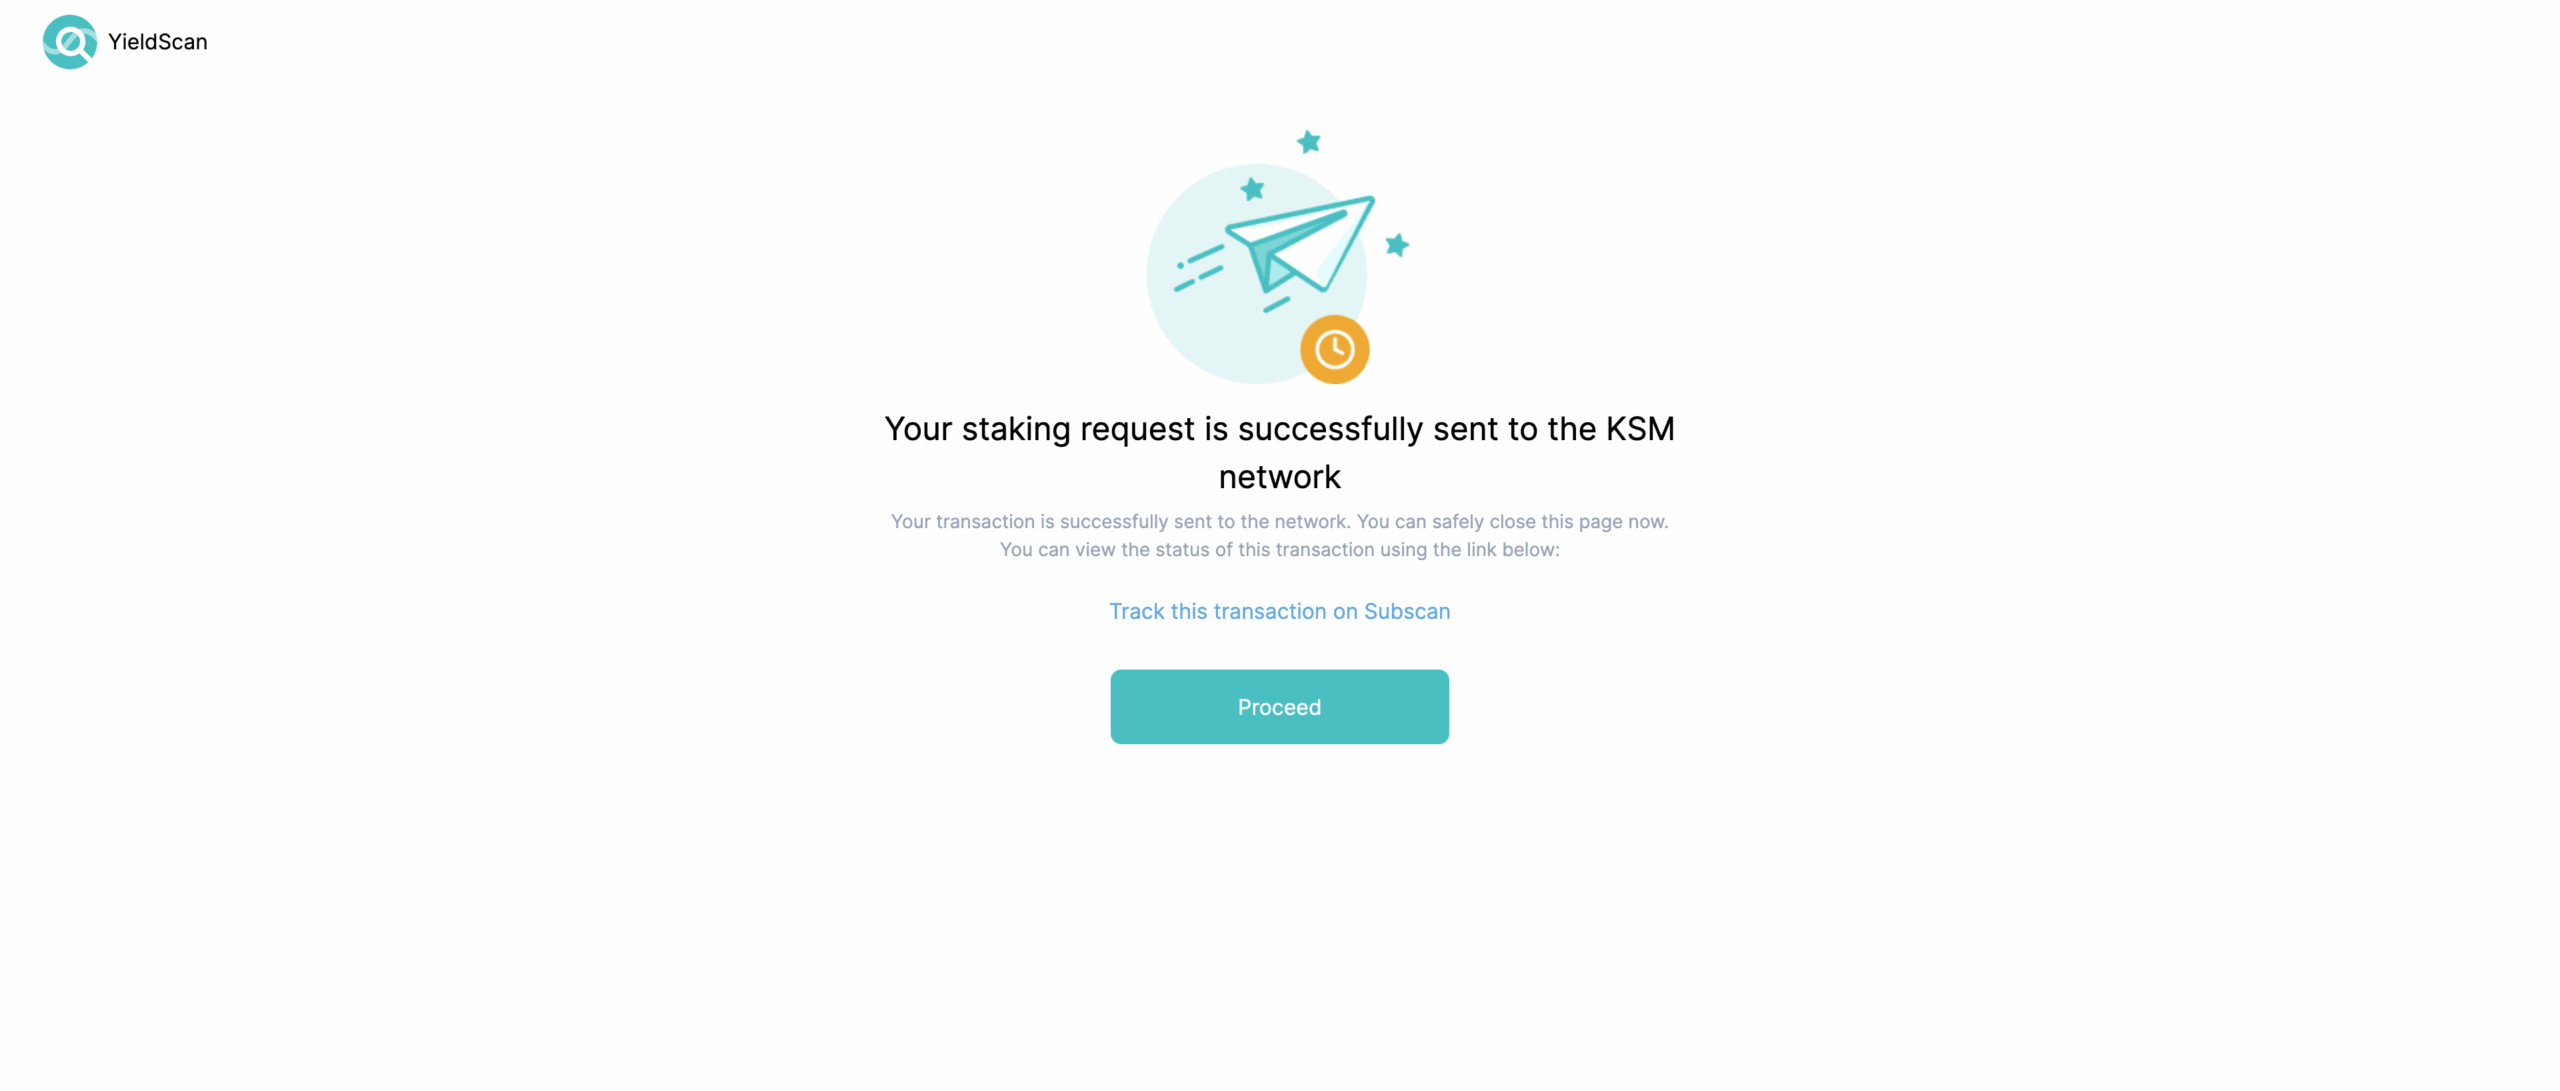
Congratulations! You’re now a nominator:
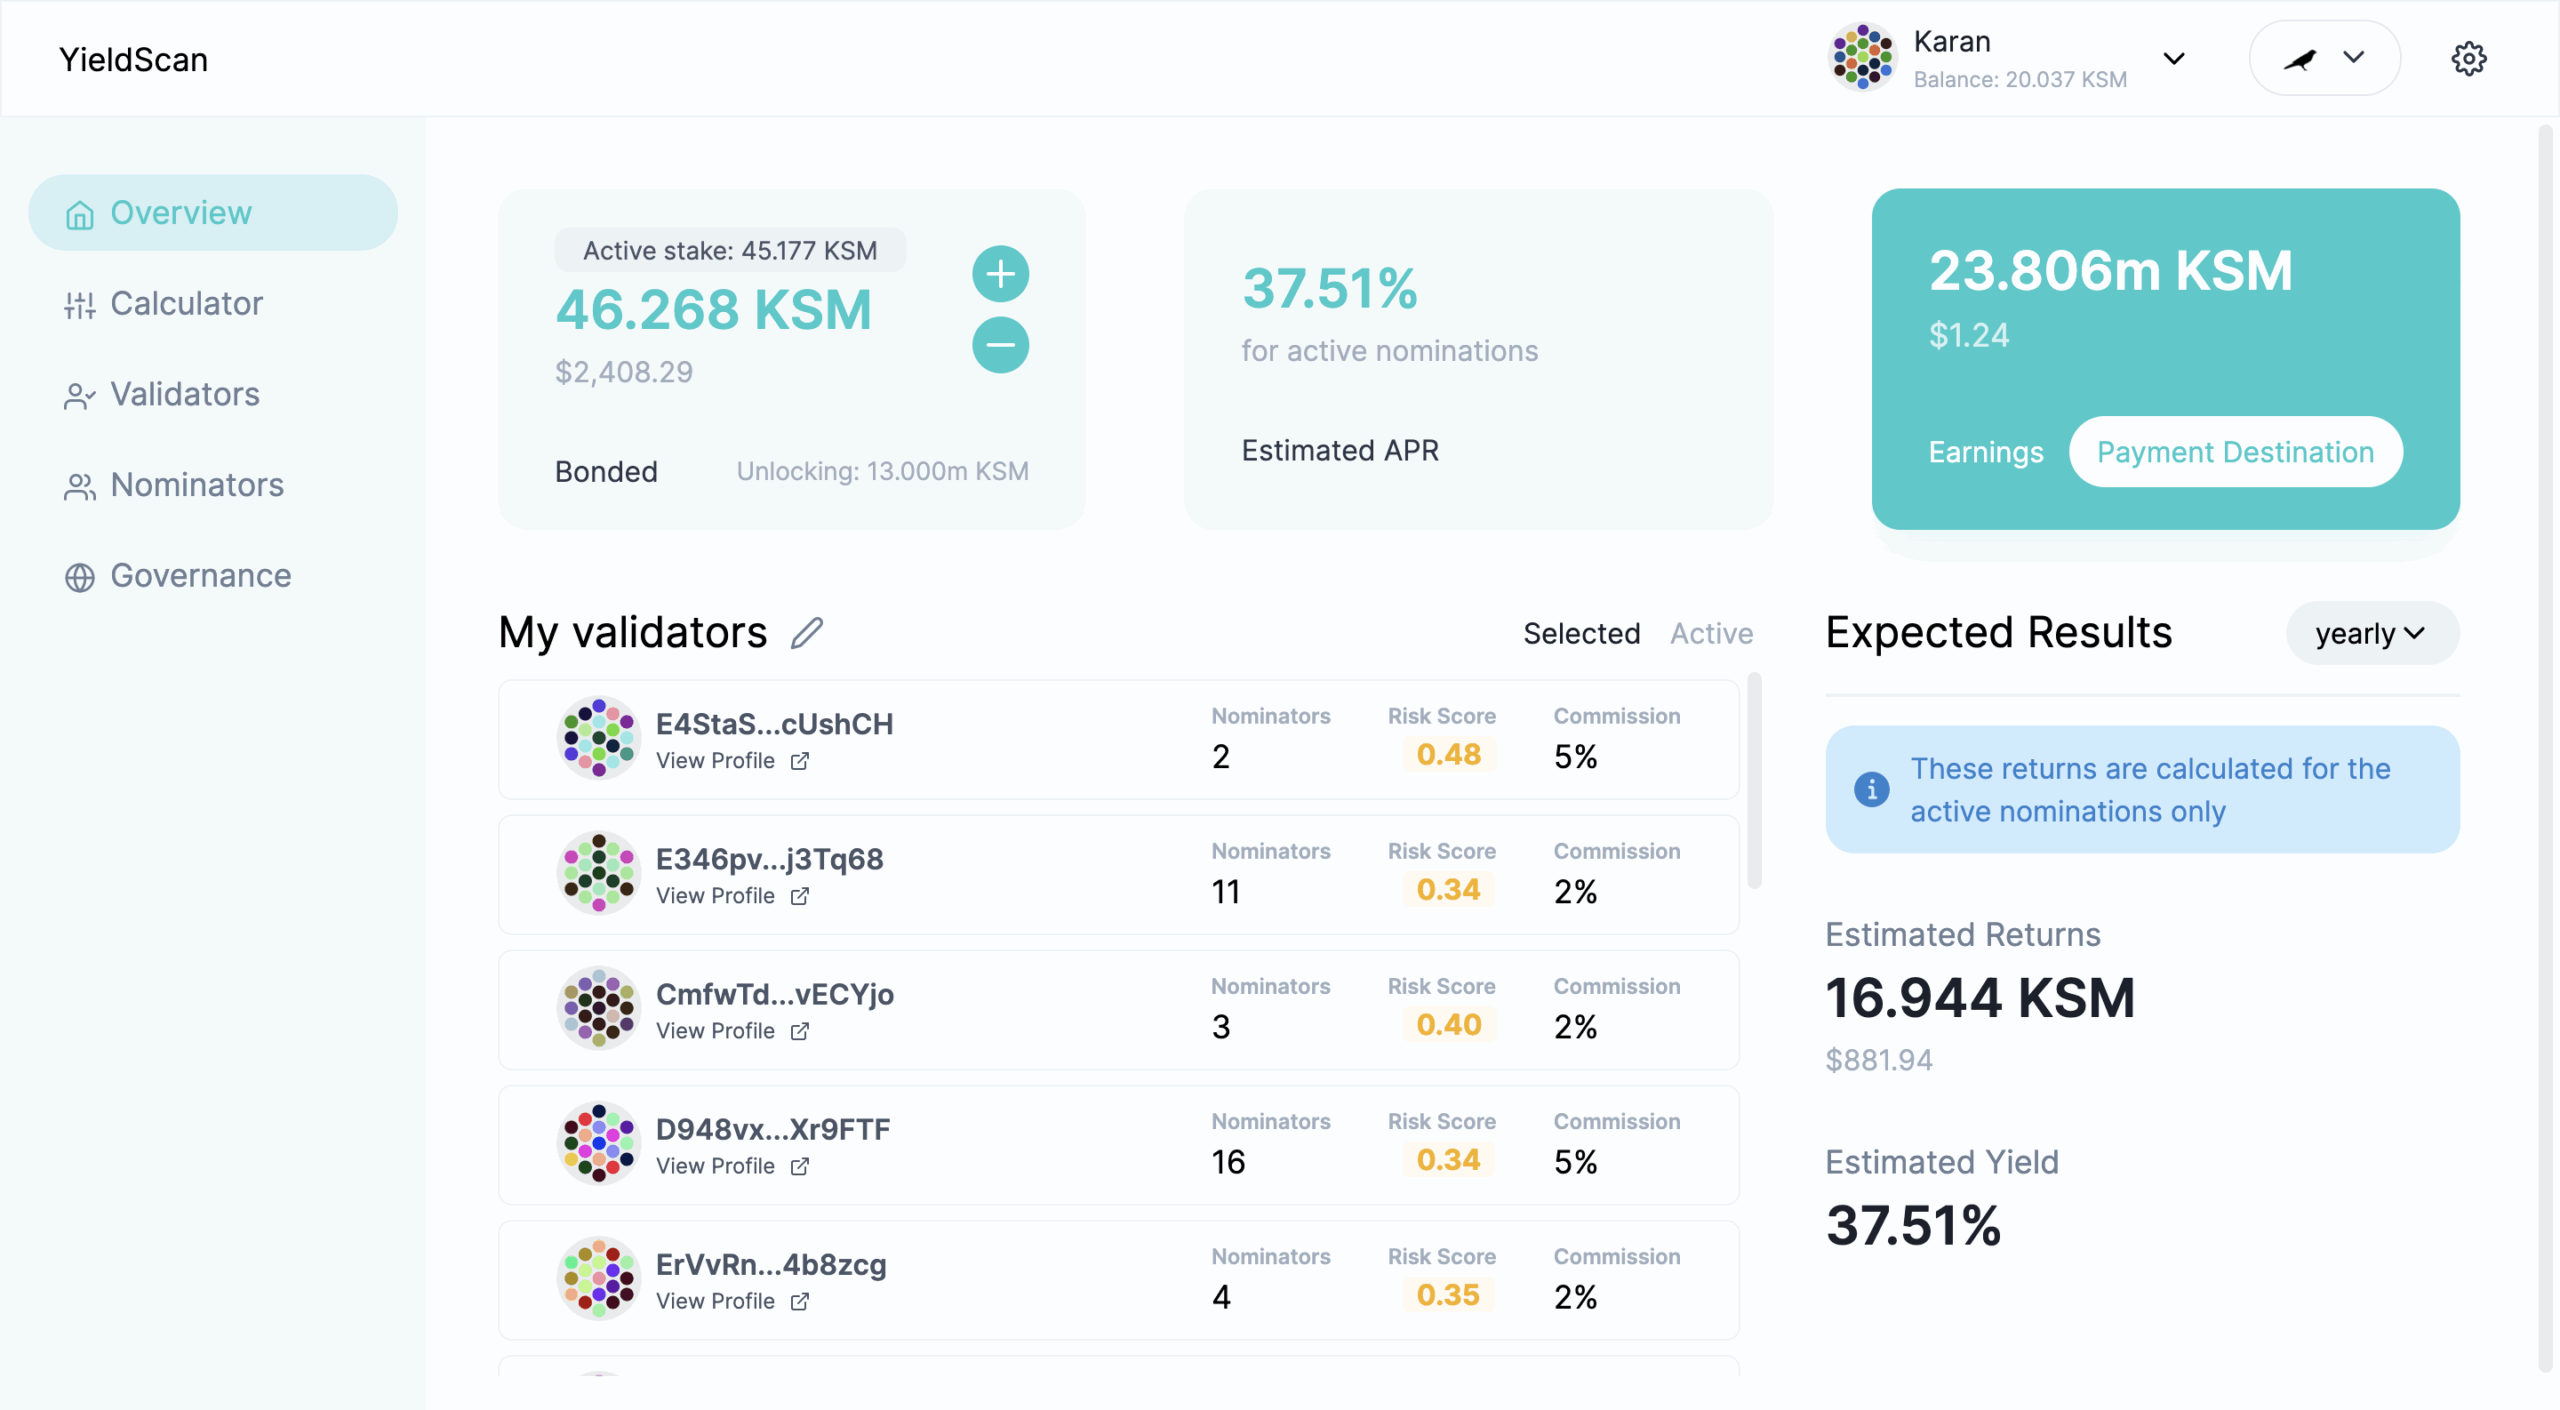
On clicking proceed, you’ll be redirected to your staking dashboard where you can see your expected returns, manage your nominations, unbond or bond more funds and change the payment destination:
# Main API endpointNEXT_PUBLIC_API_BASE_URL=<base-url-of-deployed/local-api># TrackingNEXT_PUBLIC_AMPLITUDE_API_TOKEN=<your-amplitude-api-token># For development you can pass a string like "none" - to prevent unnecessary data from being loggedNEXT_PUBLIC_METOMIC_PROJECT_ID=<your-metomic-project-id># Sentry (optional)NEXT_PUBLIC_SENTRY_DSN=<your-sentry-dsn># Only required to upload sourcemapsSENTRY_ORG=<your-sentry-org>SENTRY_PROJECT=<your-sentry-project>SENTRY_AUTH_TOKEN=<your-sentry-auth-token>
We aim to solve the problems of information asymmetry in identifying and optimizing returns on staking, reducing time and capital costs for stakers to make staking decisions.
At least one account on Kusama with enough balance to pay for transaction fees and bond funds.
Currently, the app can be used on https://yieldscan.onrender.com/, but the domain is likely to change and shall be updated here.
⚠️IMPORTANT: Please note that this project is in early beta stage and bugs and issues are to be expected.
Borrowing from Kusama’s tagline – “Expect Chaos“
Usage Instructions
Go to YieldScan. You will be greeted with the following page:
Enter your budget and click “Calculate Returns”. You will be redirected to the returns calculator, which will show you your potential earnings and allow you to tweak your staking preferences to get varied results:
Once you’re satisfied with your preferences and inputs, simply connect your PolkadotJS wallet by clicking either the “Connect wallet” button on the header or by clicking the “Connect wallet to stake” button in returns card. This will prompt you connect your wallet:
Click on “Connect my wallet”. You will be prompted by PolkadotJS to authorize YieldScan – this authorization is needed for us to prompt you to sign transactions – this keeps your keys safe and allows you to be in control of whether or not you want any transaction to be sent to the chain.
Once you’ve authorized the app, simply select an account for staking and you’ll be ready to proceed forward from the return calculator.
Simply click the “Stake” button on the returns calculator and you’ll be redirected to the payment confirmation page:
Once you’re satisfied with the selected preferences, click on confirm and read the terms of service – please make sure you understand the risks before you proceed any further. Once you understand the risks and agree to the terms, you’ll be taken to the reward destination selection step. If you have decided to compound your rewards on the calculator, you can simply proceed forward. If you decided to not compound your rewards and plan to use a separate controller for staking, then select the reward destination of your choice (i.e. stash or controller) where you would like for you rewards to be awarded and then proceed.
Finally, you’ll be asked to confirm the staking amount and the account(s) being used for nomination. You can edit the controller here if you like or use the default selection – i.e. same account for stash as well as controller.
Click on “Transact and Stake” and you’ll be prompted by the PolkadotJS extension to sign the transaction:
Congratulations! You’re now a nominator:
On clicking proceed, you’ll be redirected to your staking dashboard where you can see your expected returns, manage your nominations, unbond or bond more funds and change the payment destination:
# Main API endpointNEXT_PUBLIC_API_BASE_URL=<base-url-of-deployed/local-api># TrackingNEXT_PUBLIC_AMPLITUDE_API_TOKEN=<your-amplitude-api-token># For development you can pass a string like "none" - to prevent unnecessary data from being loggedNEXT_PUBLIC_METOMIC_PROJECT_ID=<your-metomic-project-id># Sentry (optional)NEXT_PUBLIC_SENTRY_DSN=<your-sentry-dsn># Only required to upload sourcemapsSENTRY_ORG=<your-sentry-org>SENTRY_PROJECT=<your-sentry-project>SENTRY_AUTH_TOKEN=<your-sentry-auth-token>
You will need to have Node.js installed, this project has been tested with Node versions 12.X, 14.X, 16.X and 18.x.
# clone this repo
$ git clone https://github.com/miroslavpejic85/mirotalk.git
# go to mirotalk dir
$ cd mirotalk
# copy .env.template to .env (edit it according to your needs)
$ cp .env.template .env
# install dependencies
$ npm install
# start the server
$ npm start
# copy .env.template to .env (edit it according to your needs)
$ cp .env.template .env
# Copy docker-compose.template.yml in docker-compose.yml (edit it according to your needs)
$ cp docker-compose.template.yml docker-compose.yml
# Get official image from Docker Hub
$ docker pull mirotalk/p2p:latest
# create and start containers
$ docker-compose up # -d# to stop and remove resources
$ docker-compose down
You can start videoconferencing directly from your Local PC, and be reachable from any device outside your network, simply by reading these documentation, or expose it directly on HTTPS
If you need help to deploy MiroTalk P2P instance on your dedicated cloud server, or for other needs, don’t hesitate to contact us at p2p.mirotalk@gmail.com
Contributions are welcome and greatly appreciated!
Just run before npm run lint
Questions, Discussions and support
For questions, discussions, help & support, join with us on Discord
License
MiroTalk is free and can be modified and forked. But the conditions of the AGPLv3 (GNU Affero General Public License v3.0) need to be respected. In particular modifications need to be free as well and made available to the public. Get a quick overview of the license at Choose an open source license.
Current status of this block. I use it in one fleet and works pretty well for my purposes.
You have to run the database setup and initialization and migrations from one of the other
containers, which means installing psql in the other container.
Server configuration:
The block copies all the files from a shared/persistent directory named /postgresql_shared/conf to the postgresql configuration directory.
If you want to override any of the postgresql defaults, put the entire configuration file in the shared directory. To automate this,
have your own container copy the configuration file to the shared directory and have postgresql DEPEND on that
container in the dockercompose.yml file. For example:
  mycontainer: # copies config files to /activemq_conf
    volumes:
      - 'resin-data:/postgresql_conf'

  postgresql:
    image: bh.cr/g_john_rodley1/postgresql-11-block
    volumes:
      - 'resin-data:/postgresql_conf'
    depends-on:
      - mycontainer  # don't start postgres until mycontainer has copied the right files into /postgresql_conf
The configuration files of most interest are postgresql.conf and pg_hba.conf. The repo contains
a sample of each.
postgresql.conf:
data_directory – if you leave the default data directory which points to containerized storage then your database will disappear on every deployment.
pg_hba.conf:
You will likely want to add lines allowing both your local network and other containers to access
the database. See the sample. Example:
host    all             all             192.168.21.237/32            md5
host    all             all             172.0.0.0/8            md5
Database initialization and migration:
All application-specific database work are the responsibility of the client container.
Environment variables user in this container:
POSTGRESQL_UNIX_USER unix username of the user who owns/runs the postgresql processes/files, typically “postgres”. Only tested where POSTGRESQL_UNIX_USER and POSTGRESQL_POSTGRES_USER are both set to “postgres”
POSTGRESQL_POSTGRES_USER POSTGRES username of the user who owns and has ALL rights within the postgresql installation, typically “postgres”.
POSTGRESQL_POSTGRES_PASSWORD postgres password (not unix password) for the postgres user IN POSTGRES. The block resets the postgres user password to this value on startup.
POSTGRESQL_SYSTEM_DBNAME name of the system database, typically postgres
POSTGRESQL_SHARED_DIRECTORY full path to root shared directory (among containers) under which postgresql container will create additional directories to run postgres, typically /postgresql_shared